Wednesday, May 29, 2013

The Nursery Chronicles: Step 9, Part 2: Finishing Touches


Can you believe it!?! We are wrapping up another Chronicles series (finally)!
In this post, I will just go through a couple before photos and then I will show you how the room looked when we put our sweet little house (can you tell I'm starting to get sad about leaving?) on the market.
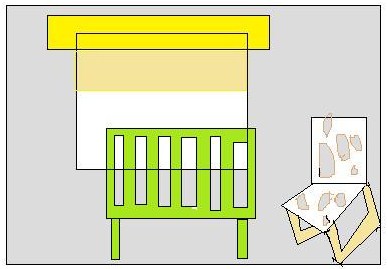
Top photo: before we moved in.
Bottom photo: When I tried to DIY a headboard and went pink-tastic on the room.

Here is the photo that the professional photographer took of our house. 


While the house was super clean and tidy I took a few minutes to run around snapping some of my own wayyyyy less fancy photos.


Well, there you go... I think that pretty much covers it. Now, you have seen every angle of the nursery and know about every project. Thanks for coming along for the step party!

Here are all of The Nursery Chronicle Posts:


The Nursery Chronicles Start-Up Post


Step 1Get rid of the old furniture and try out some more baby-centric duds for the room. Crib, bookshelf, and daybed.

Step 2Convince my husband to do more painting than anyone would ever want to do in their whole life. Start the painting spree by painting over the headboard on the wall. Get a dresser/ changing table and refinish it.


Step 3Get some more furniture. Start the decorating: Wire display for pictures.


Step 4a: Put up the book slings.

Step 4b: More decorating: Floating shelves.

Step 5: Decorations, Part 3: Hang art above the crib and all around the room

Step 6: Refinish side table and get an ottoman


Step 7: Paint the chalkboard and mirror and hang them.


Step 8: Put up the curtains. Line the inside of the dresser with some of my extra fabric


Step 9: Part 1, Part 2Finishing touches.

Monday, May 27, 2013

Happy Memorial Day!

Happy Memorial Day!

I hope those of you who have the day off have a fabulous one! I will spend the day packing, packing, packing, packing. One week from today we move everything out of our house. We are still going to spend the night in the house (camp-out style with no beds or anything) because it makes me sad to think that we could have spent an extra night in our sweet old house and we didn't.

It is all starting to hit me. We are about to leave the house that we lived in when we got married, when I had Cora, when she took her first steps, and said her first words. What makes this all even harder is that Cora is getting sad about things getting packed away or taken down from the walls. Every day, she points to where a picture of a llama hung on the wall and says "llama gone" in the saddest/ cutest voice you've ever heard. Then I say, "I know the llama is gone, but we will see him again." She starts nodding like she knows everything is going to be OK and says "Dav Dav" meaning we will see the llama again in Davidson. Then we repeat this process with the penguin, the duck, and the pig. Aha! As I am typing this I just figured out that she is talking about her piggy bank. I had been trying to convince her that there was no pig picture in her room.


And, now you know the three most important things in Cora's room. I didn't know they were favorites until they were gone.

We stopped by our new house to check out the progress for a quick second yesterday and Cora picked out where the llama, the penguin, the duck and the pig would go in her new house.

Here she is checking out the ceilings with Scott.

The good news for Cora about us taking everything off the wall is that the chalkboard in her room is temporarily at her height.

Here is one more Cora photo to celebrate Memorial Day (let it be known that this photo has nothing to do with Memorial Day). On the way up to see our new house, we saw a random dog in our neighborhood that looked like it didn't belong. So, I stopped and checked its tag. Sure enough, it was from a nearby neighborhood. The dog was SUPER DUPER friendly and Cora thought it was pretty fantastic that we got to hang out with the dog until his owner came.
ps this photo doesn't show off the dog's happy personality. I promise he was a sweetie.

The Memorial Day fun isn't over yet. I have a few shout outs:

Happy birthday to my BFF, Sandra Dee!!!!


Congratulations to my dad and my sister for finishing their walk on the Camino de Santiago. They went to Spain and walked about 200 miles in less than 3 weeks. You can follow the adventure on my dad's blog, Young Codger!
Here they are walking on the camino. They hit a bit of a snow storm, but for the most part they had pretty nice weather.

I hope to be back with a full post tomorrow!

Friday, May 24, 2013

OO: Even More Closet Organization

It is Organization Overhaul time in the hizzie! Are you all ready for this?

Today, I am going to show you Cora's closet clean-up. I also compiled a snazzy listerama of my favorite closet organizing tips that I have given you in the past.


I am sorry to say that this is not my closet transformation, but it is an especially lovely one so take a look:


You just wait until I get my hands on the blank canvas closets that live in our new house. Things are going to get wild around here (if you consider really efficient shelving wild)!

In past closet organization posts I have dispensed lots of random organizational knowledge to you. And, I am about to do it again. 


In between these tips, you get to take a look at a much less exciting transformation than the one above. I have some before and afters of Cora's closet after a big clean-up happened in it.


Sorry these photos aren't very exciting, but any before and after is better than no before and after, right? ehh??

From My Favorite Organizing Tips Post:
  • Get in the right mood for organizingPut on some comfy clothesTurn up the music. Choose to organize at a time of day when you feel most energized. Try to plan it so you can have a whole day or at least a few consecutive hours to work your organizational magic. If you only have little bits of time try to break up your organizing into small parts. Just do one quick shelf here and there.
  • Take a look at the things that are causing your organizational trouble. Then fix it. 
  • Label everything
  • Put it away now! 
  • Make your messes prettyUse nice baskets, colorful paper or paint to beautify the area that you need to organize. At the very least, it makes for a good after photo! 
  • If you have all sorts of cool mugs and pottery in boxes, pull them out and use them in your medicine cabinet for cotton balls or on the desk as pencil holders. 
  • My two biggest pieces of advice: 
    • put like with like, always
    • give every item a home- even if it is a box labeled "random stuff."


How about a few tips from: OO- Master Bedroom Closet, Part 2:

Step by Step: How I Organize A Closet:

  1. First, I remove all items that obviously do not belong
  2. Now, I go through everything and group all like items. I always start in the messiest area and end up in the tidiest area.
  3. After I have been through all of the nooks and crannies of the closet I think about the best location for each grouping.
  4. Undoubtedly, I soon find myself starting to wander and ditch the closet, leaving it half done. To combat this I work on another project that will make me happy- like putting clothes in order of color.
  5. As soon as I feel like mind-wander-itis has passed I get back to the important task at hand- finishing the closet!
  6. I do the final few sortings. Then it is time to fold, stack and tidy.
  7. After a good closet cleaning, there is always a huge pile right outside the door of things that need to go other places. So, I deal with that. 
Get ready for another non-Laura-organized closet before and after photo (at least they have Microsoft Paint skilllllz like I do though!):


A Few More Closet Organizing Tips From OO- Master Bedroom Closet, Part 2:
  • Keep a few boxes handy. One for donation. One for "I want to keep it but I never wear it." And one for "this goes to someone else or another room in the house." I try to keep the "I want to keep it but I never wear it" box in the attic for about a year. If I haven't touched it in that time I will get rid of most of it.
  • I have one entire closet in my house full of boxes and containers. If you have a ridiculous area like that take a peak at it after you have grouped all of your like items. See if you can find any containers that fit your new group of similar items to keep them nice and tidy.
  • I have learned a few things from the show What Not To Wear. I don't always take their advice. But I do think about it every time I am going through my closet. Ask yourself 3 questions:
    • Do I love this item?
    • Is it flattering?
    • Does this article of clothing help present the image I want to project?
If the answer is yes to all three then you can keep it!
  • Matching hangers! They make your closet look fantastic! 
You can find some More Closet Tips in the posts below:

OO- Coat Closet


OO- More Closets

OO: Tips & Tricks For Organizing The Linen Closet

Goodbye and Happy Weekend from Cora!

Wednesday, May 22, 2013

The Nursery Chronicles: Step 9, Part 1: Finishing Touches

Guess what is about to happen!!! Last week, we concluded The Bonus Room Chronicles and now we are one step closer to wrapping up another chronicle series!
There will just be two Chronicles left... The Living Room Chronicles and The Master Bedroom Chronicles

Were you hoping to get another glance at my fabulous skills using the super basic program, Microsoft Paint? Good! 


When I was planning the room, I envisioned something like this:


The main differences were that I added a bunch more art, less photos in the bookshelf (and wayyyy more books), didn't go with yellow bedding or crib skirt, went with yellow curtains instead of green, bought a white Expedit bookshelf from Ikea instead of painting an old one white with yellow behind the shelves, my mom gave me her old rocking chair so I did not end up buying the one from Ikea that I had picked out, and I did not make a pretty yellow mobile.

I considered adding yellow stripes to one wall of the nursery, but decided against it after my lovely husband said that he was getting really tired of spending all of this time painting!


  1. A Craigslist find
  2. Ikea Poang rocking chair
  3. White bookshelf with yellow background. Unfortunately, I didn't save the link.
  4. Pretty flowers painted on the wall. Link unknown (sorry)!
  5. Ikea Gulliver crib
  6. White West Elm Window Daybed
  7. Gray Ikea Gislev rug
  8. DIY Bookslings
  9. Pretty mobile. Another link unknown (double sorry)!

After I finished all of the furniture buying, I drew up some new plans that look a lot more like what it actually is today:
Just in case you were wondering, here is a different arrangement that I was considering:


I wish I could finish this chronicle shmonicle off today, but you know how like to leave you hanging. I will be back soon enough to show you the final photos.

Here are the afters that I have been showing you throughout all of The Nursery Chronicles, but I have changes things up a bit since then. So, just you wait. 


Step Time:


Step 1Get rid of the old furniture and try out some more baby-centric duds for the room. Crib, bookshelf, and daybed.

Step 2Convince my husband to do more painting than anyone would ever want to do in their whole life. Start the painting spree by painting over the headboard on the wall. Get a dresser/ changing table and refinish it.


Step 3Get some more furniture. Start the decorating: Wire display for pictures.


Step 4a: Put up the book slings.


Step 4b: More decorating: Floating shelves.

Step 5: Decorations, Part 3: Hang art above the crib and all around the room

Step 6: Refinish side table and get an ottoman


Step 7: Paint the chalkboard and mirror and hang them.


Step 8: Put up the curtains. Line the inside of the dresser with some of my extra fabric


Step 9: Part 1, Part 2. Finishing touches.

Monday, May 20, 2013

Floor Plans And Ideas: The First Floor, Part 3

Maybe this blog ought to be called, "Let's divide things that most people could cover in 10 seconds into 100 posts." Because that is what I like to do. Sooooo it looks like the first floor plans will not be finished in one post, not even in two; three is not happening. So, let's hope I can manage to wrap them up in four posts!

For now, we will just concentrate on part 3: The massage room/ guest bedroom.


The 1st Floor Bedroom:
Do you remember the whole Murphy Bed fiasco (bought itthought we had to sell it)? It turns out that it is a good thing that we held onto that bad maama jamma because it is going to have a lovely home in our guest bedroom/ massage room (ps have I told you all that I am a Neuromuscular Therapist when I'm not blogging or Cora-wrangling? Well, I am!). As you can see from the plans above, the Murphy Bed will rest nicely against one wall while the massage table is being used. When we have guests, old massage-o scoots out of the way and the room turns into a lovely guest suite!

Here is ol' Murphy Brown herself:


Eventually, I may paint the wood veneer on Murphy Moo, but it will take a look of convincing Mr. Never Listless before that happens. If I do change it, I think I would add some trim to the doors to break them up a bit and paint it white. Maybe something like this:

Or maybe paint it a fun color like this:

The bookshelf will either be this one from the foyer:

or this one from the massage room:

I am going to try to do a much better job at this house making my guests feel welcome. We have always had a guest bed, but we rarely have any hanging space for our guests. The only thing we usually have for them is clean sheets, towels, and soap. 

In this house, our guests will get all of the things I mentioned above. Plus, I will have the wireless password for them. They will also get shampoo, and all the other bathroom necessities I can think of. And, if I am really on top of everything, I will put mints on their pillows and turn down their sheets (I learned this trick when I recently visited my dad). The only problem is that we try not to keep many sweets in the house because they disappear into my stomach. 

Who is ready to visit me now?

Since the closet in that room will be used as Scott's office, I plan to put a little valet rod in there for any hanging clothes our lovely guests might bring. 
I'm thinking something like this on the back on the closet door:

Flowers, bathrobes, slippers, etc would all be nice for guests too. But, these days I'm happy if I can get fresh sheets on the bed for my guests. Does anyone have any other suggestions for making your guests feel at home? Dig into your memory bank and pull out my post around Christmas time about my friend Mary who puts Christmas trees in her guest bedrooms during the holidays. Now, that is a hostess with the mostest.

Friday, May 17, 2013

Cartooning Yourself!

The other day, I randomly came across a pretty good website if you're in the mood for a little bit of time-wastin'.
Who doesn't want to turn their photos into cartoons? Check out Cartoon.Pho.to to do it yourself for free!

I played around with it a bit and here are some of my favorites:


ps there is a new Best Of Cora Photos post up on The Etc. Lists!

Wednesday, May 15, 2013

The Nursery Chronicles: Step 8: Put Up The Curtains, Line The Dresser

I am trying my best to wrap up all of the chronicle series before we move out of this house. Right now, we are one down and three to go. 

I am sorry to tell you that this particular step is not the most exciting one, unless you consider giraffe fabric exciting. In which case, you are going to go BONKERS over this post!

The last time that The Nursery Chronicles graced your eyes, we were painting things yellow and hanging them on the wall. This time, we are hanging curtains and lining dressers.

Curtain Hanging:
I didn't take photos of the actual process so you just get the before and after. After many trial and error lessons learner we now get the curtains before hanging the curtain rod if that is at all possible. That way, you don't have to worry about the curtains being turning into high-water-pants. You can make them hang wherever you want!

Here you go... the before curtains and after on the right side of the room:


And, on the left side of the room:

The monkey heads resting on the curtain rods are funny hats that my BFF gave to me at my baby shower. She suggested we bring them to the hospital and wear them there. So, we did!
When we got home, we put them back on their curtain-rod-resting-place.

Drawer Lining: 
For this, you get a little photo run-down:

These are some pretty obvious steps, but you get them anyway. If you want to make your life even easier you can just get contact paper or don't line your drawers in the first place! I lined these because I had tons of extra fabric, I wanted the drawers to look pretty, and I bought the dresser off Craigslist and I didn't exactly trust a few spray downs to make it clean.

Step 1: (Thank you New Kids on the Block, every time I ever say "Step 1" I sing "you can have lots of fun). Step one, make sure your fabric is nice and straight and cut off any stringy edges.
Step 2: Measure the drawer and mark the fabric.
Step 3: Cut the fabric.
Step 4: Learn that there is an easier way to match up velcro than by using an intricate arrangement of strips.
Step 5: Put the fabric in the drawer and figure out the velcro arrangement from there.

Tada! Done!!

Ooooohhhh, but this isn't over just yet. Now, I would like to show you what lovely and talented ladies I have in my family! As I said earlier, my mother-in-law sewed the fantastic curtains that you just saw. 

My sister made all of the pillow covers! They looked professional!


My sister-in-law made Cora a super adorable quilt. I had tonsssssss of leftover giraffe fabric so she used that on one side and quilted some neat stuff on the other.


And, my mom, who is not much of a seamstress held onto every toy and book that her future grandchildren could possibly want. And, let me tell you, they (Cora anyway) LOVESSSSSS herself some 1980s Fisher Price toys. That is not my mom's only talent- she broke out her inner seamstress and made this funky rug-thing. It is more of a closet-wall-rug, in my opinion. But nonetheless, it is still cool. 


So, thank you to all of the talented women in my life who helped make Cora's room into the colorful baby abode that it is today. 

Here are the Nursery Chronicle step-diddy-do-dahs that got us to where we are now:


Step 1Get rid of the old furniture and try out some more baby-centric duds for the room. Crib, bookshelf, and daybed.

Step 2Convince my husband to do more painting than anyone would ever want to do in their whole life. Start the painting spree by painting over the headboard on the wall. Get a dresser/ changing table and refinish it.


Step 3Get some more furniture. Start the decorating: Wire display for pictures.


Step 4a: Put up the book slings.


Step 4b: More decorating: Floating shelves.

Step 5: Decorations, Part 3: Hang art above the crib and all around the room

Step 6: Refinish side table and get an ottoman


Step 7: Paint the chalkboard and mirror and hang them.


Step 8: Put up the curtains. Line the inside of the dresser with some of my extra fabric


Step 9: Finishing touches.


And here are a few after photos from the nursery: