Monday, September 3, 2012

Decarpeting The House And Silencing The Stairs


It was Carpet City in our house when we moved in. It was in the bathrooms (I am not sure that toilets and carpet are supposed to mix), on the stairs, on the wall (it is on the wall part of a step from one room to another... I am calling it the wall) and it smelled like cat pee like you wouldn't believe.


Sorry. This is the best before photo I have of there being carpet all up in the toilet's face. Just trust me. It was there.


The carpet had to go. I KNOW THAT'S RIGHT!


  • First, we ripped up all of the old carpet and vinyl.
  • We paid to have someone put the new carpet down for us, but we saved money by ripping up the old stuff ourselves. I am not quite sure how much we saved and I would do the same thing again but that is because I am pretty darn cheap. It was a lot of work cutting that carpet into just the right sized pieces so our bulk trash pickup would take them. We also had to lug them up to the curb. And the best looking part of it all was that the area of my arm that was showing between my gloves and my short sleeve developed some gross, red spots from carrying yucky carpet. That's right people... I AM A FANCY LADY!
  • We sprayed vinegar on every surface of the floor (lots of internet research told us that this would help combat the cat pee stench). That did not do the trick, so we tried it again and again. It smelled a little bit less each time, but it was still there. So, I called a pro... our old neighbor who is a professional painter. He suggested something called "Zinsser Bin Primer/ Sealer."  This is the holy grail of pungency. It smelled stronger than any paint or stain I have ever used. He told me that this is used after a fire to cover up fire damage and he has used it to cover bad smells.  It worked!!! Not the slightest hint of cat pee anywhere.
  • After the smell was gone we could concentrate on our new flooring.


We had bamboo flooring put down in the living room and dining room.

We put beadboard on the little step in the living room where carpet was on the wall.  I tried to match the color of the bamboo when I painted the bead board.

Before Bamboo and Bead Board:


After Bamboo and Bead Board:


We had tile laid on a diagonal in the kitchen and bathroom (yay for no more toilet carpet).

The Floor Before The Tile:
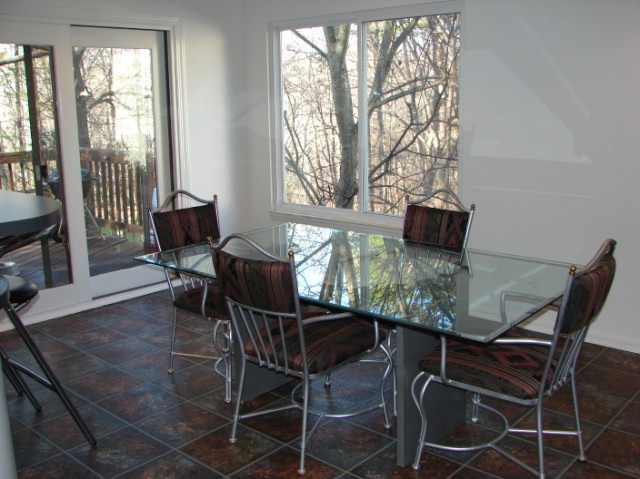


The After Photos:


Now onto the stairs... I knew that I did not want carpet wrapped around what could be a pretty cool open staircase. So we ripped the carpet off and underneath was a builder-grade step. It wasn't pretty and there were nail heads popping up from both sides of the step.

Before Any Change To The Stairs:


As a temporary solution I painted the steps black. (Temporary turned into almost 4 years).

I also painted the railings from white to black to match the steps.

My father in law suggested that we not wrap the carpet around the wall near the railings like it had been.  So, we had the carpet people stop the carpet with some tacks and we put up some boards to cover the seam.

After Painting The Stairs and The Raling:


Fastforward 4 plus years. We now have a baby who is not the world's best sleeper... HUGE UNDERSTATEMENT.

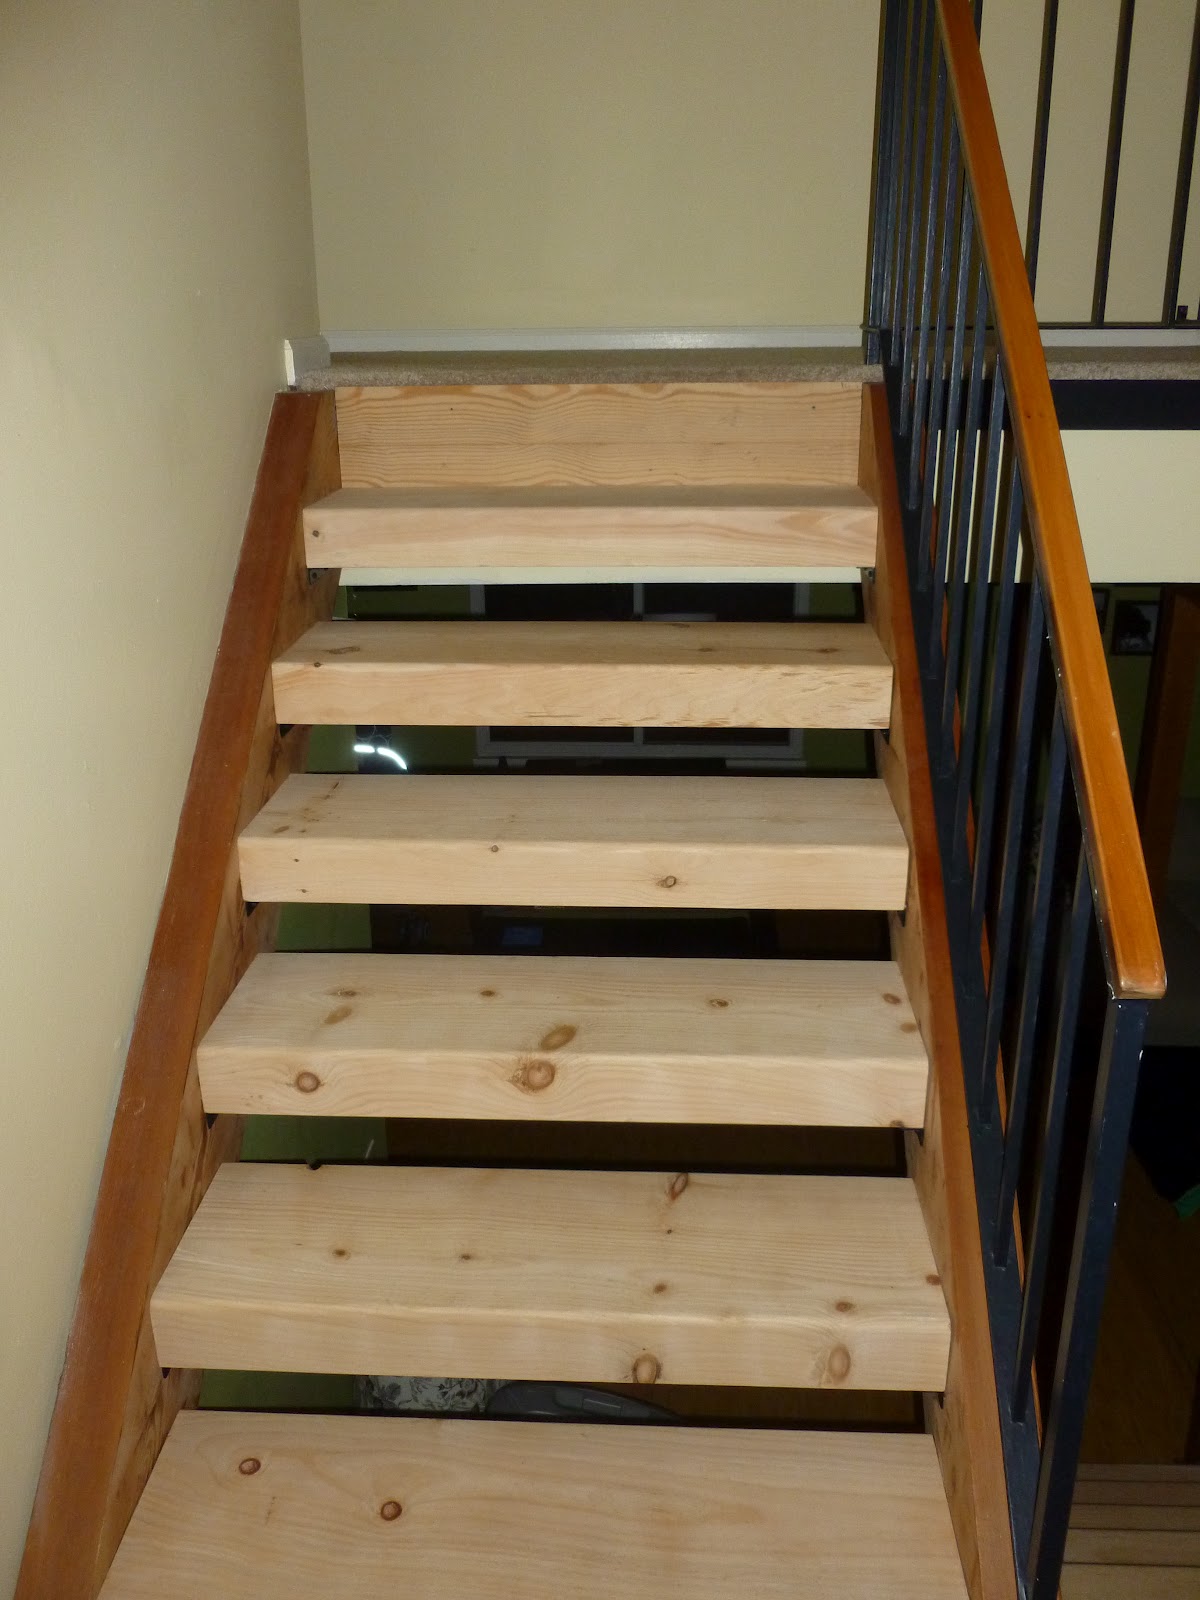
You cannot believe how loud and squeaky our stairs are. It sounds like an elephant brought his entire circus squad to dance around on them when you walk down the steps.

We knew we wanted to upgrade the stairs eventually but we wanted to do some research... apparently four years worth of research to figure out what we wanted to replace the steps with.

After a few months of me making Scott go around the house instead of down the stairs so he would not wake the baby we decided new stairs were a necessity.

I called around a few places and got some quotes. Everyone was very helpful but I didn't love any of the ideas people had. Most everyone wanted to use a junky wood wrapped in a nice piece of wood to give it the appearance of one big piece of chunky wood.

Finally, someone referred me to "The Stair Master." Who knew... I should have just googled "stair master" in Charlotte to find what I wanted.

Mr. Stair Master suggested getting one big, honkin' piece of wood for each step and cutting each one to a different size so it would be a perfect fit. It turns out that I like a big, honkin' piece of wood! The only thing was the price was not right. I talked him down about $200. The price was still not right but the cost seemed worth it to help ease the stress of being crazy, new parents (maybe just crazy, new mom).

This is a photo that I sneakily took soon after he arrived. I was so excited to see the beautiful, new steps!

Here they are going in:


Check out those cute, little feet in the bouncy seat at the top of the steps. This is before she was anywhere near mobile. I promise she was safe!


I don't think Mr. Stair Master knew I was taking this photo.


Mr. Stair Master recommended we let the stairs dry out a bit more and also get some patina to them before we polyurethane or stain them. They have really darkened up quite a bit since they were installed.

I will be sure to post an updated photo of them when we get around to polying them.

I love my beautiful, SILENT as can be new stairs! In fact, the stairs are so quiet that Scott and I kept startling each other because we used to know as soon as one of us placed the first hint of a foot on the stairs.


Sunday, September 2, 2012

I Can Draw A Table!

and clearly I have mastered the computer program, Paint.


I have made you a list of the drawings that helped me decide what colors I should use to turn this desk:


into this desk:


Have you had your fill of bizarrely drawn desk variations? 
No? Well then it is your lucky day.


Don't you worry your pretty, little head. I have another post coming your way about how the painting process went down.


A New Chair For Cora

Scott's parents gave us an old child sized rocking chair that used to belong to Scott's grandparents. I love it and I knew Cora would love it. It just needed some TREAT.YO.SELF. fixing up love by my good bud, Mrs. Spray Paint.


We also have some wonderful adult sized rocking chairs and a PORCH SWING from Scott's grandparents. We never put the porch swing up in this house which was a big mistake. That thing is awesome.

Here is a photo of my lovely sister and I enjoying it at my last house back in the ol' decade of 00s. What do you call that decade? The choices will be presented in list form below.


  • The Aughts (Scott's name for them)
  • Double Oh Agents
  • The First 10 Years of Awesomeness
  • Getting Ready for 90 More Years
  • The Zero Heroes
  • T Minus 99
I had a throw a random list in for you. None of those titles are really grabbing me. This list may have to make a reappearance after some time with the think tank.

One more random thing. Look at the crazy storm that was rearing its' ugly head while we sat in that fancy swing.


OK back to the the ROCKING party!


Here I am carving a duck pumpkin for Halloween back in The Aughts. Check out those awesome rockers in the background. 


Those are the chairs that used to live with the porch swing, and our buddy, "lil porch swing" at Scott's grandparent's house.

I did a little spray painting with my favorite shade of green and here is how she turned out.


Perfect and I didn't even have to break out the sand paper.


Here is Cora enjoying her new chair. 


I had been outside working on a little painting project and I came inside to this scene. Scott was playing the ukulele and Cora was hitting/ eating her sticks. It was one of the cutest things I have ever seen.


Saturday, September 1, 2012

Beautiful leaves and more light!


I have not introduced you to the beautiful views and trees that came with my house. I don't want to overwhelm you with too much beauty at once. Let's start slowly.

On my deck I have a hammock that has a canopy of trees over it.  One day, I was lying on that hammock and realized how beautiful the leaves above me were.  So, I started taking photos and got some really neat ones of the leaves.


Our living room had no overhead lighting when we moved in. The ceilings are maybe about 18 feet tall and it can be a darkness factory in there at night.


Scott came up with the idea of putting a light on one of the highest walls in the living room. We wanted spot lighting so we could light up different areas of the room. So I looked around and found what I was looking for at Lowes. I bought one bar that you can attach a whole bunch of fixtures to. The bar is black and I chose five black lights to go with it. 

I don't have a very good before photo but the top right hand corner of this photo is where the light fixture started.


Here it is from another angle


We have a handy man (actually, he is more than a handy man. He can do ANYTHING house related. He does it all perfectly. We are some serious lucky ducks finding him). He figured out a way to pull the electricity from a different room and connect the light with a remote. It is perfect!

Presto! We now had a well lit living room and a new area just aching to have some art on it.


How I made my leaf art:

  1. I bought eight large black frames that are not meant to be picture frames. There are meant to have fabric stapled to them.
  2. I painted them black. 
  3. I bought some foam board and cut it to fit in the frame.  
  4. I picked my four favorite photos and made about twenty copies of each one.
  5. I cut pieces of each photo into 128 equal sized squares.
  6. I glued rows of four equally spaced onto the poster board.  
  7. I spent a long time making sure all of the frames were spaced evenly in all directions on the wall. That was the hardest part.

Here they are in all of their green glory


Murphy Bed Buying On A Whim!

There is no Eldin here. I'm not talking about Murphy Brown. I'm talking about a fancy, fold on down, hide it when you want to Murphy Bed!

I did my research and I found an amazing deal!
When you hear the words "amazing deal" you should automatically be able to guess...
CRAIGSLIST!

Murphy bed questions of the day (in list form, of course):
  1. Who would want to buy a murphy bed that they are not even sure they can use? 
  2. Who would want to buy a murphy bed when the earliest they will possibly use it would be 2 years from now?
  3. Who would want to buy a murphy bed when they know that they are going to have to transport the ginormous piece of furniture at least twice? 
  4. Who would want to store that gigantic piece of furniture in their garage for a year while selling their house?
Well... a little drum roll action would be nice. 

The answer, my friends (my friends being my sister and my husband... the only people who read this blog) is ME! Laura Ross Spencer. I am the one. It is I.

Look how happy I am in the photo below! That girl in black (me) looks like someone who just answered, "I would" to those last four questions.
*The photo is obviously from the opening ceremony of the Sister Sister Olympics! More on that another day.


It all started with the research. It always does. I very rarely do my decorating in the spur of the moment.

First, I did the fun stuff. I google imaged pictures of murphy beds. I found some fantastic options like the ones below.


Snazzy! I think I am mainly drawn to the floating shelves in this one.


Hello, office. What do you store in that massive cabinet? Maybe a turbo strength printer?


Sneaky, Sneaky. Super sneaky.


Ohhhhh la la! These colors will stop me in my tracks on any google image search.


I love the idea of adding some funky patterns to it.


Looks a little DIY! Definitely not a Laura DIY... this one is a bit more legitimate looking.


Next, I started checking out how I would DIY a murphy bed for $500 or less. The answer is simple. I would not DIY a murphy bed for $500 or less. The hardware alone is whopping $300 and that is just for the metal part... no wood or framing included. The other part of the problem is that I have no idea how to build furniture. 

There may have been a little pouting to myself for a second. But I was over it quickly because I turned to my best pal, Senor CRAIGSLIST.

I couldn't figure out how to put a tilde on the word senor so I added a sombrero instead. Hope you don't
mind.


The first item that popped up in my Charlotte Craigslist was a photoless ad for a "brand new" murphy bed for $400. It seemed too good to be true. So, I emailed asking for photos. I got a quick, polite response with these two photos of a beautiful, brand new murphy bed.


Whoa! The next step popped into my head before I could start hyperventilating about what a good deal this was. 
Step 5ish: Convince husband to answer "I would" to the questions at the beginning of this post.

I called and told him about it. He automatically said that it made no sense. He was right. It didn't. So I forwarded the photos along... he became slightly more interested. Finally, I convinced him that it would definitely be worth it if we could get it for even cheaper than the $400 it was listed for. 

So I replied to mr craigslist murphy bed telling him that I think he was selling it for a very fair deal but it made no sense for us to buy it unless it was an out of this world deal and I offered $200. He wrote back and said $300 would take that nifty little bed away. He didn't actually use the term nifty but I think we all know that he should have. 

The next day the Home Depot rental truck was in our possession and that bed was to be mine. We met him at a condo building. He was a Realtor and had sold the last unit in the building. All of the units came with Murphy Brown beds but this particular buyer decided she didn't want it. So it was his job to get rid of the bed quickly.

We set to work unbolting it from the floor. Scott and Mr Realtor were working hard getting that thing unbolted. I was busy entertaining my sweet, little baby with things like opening and closing the door.

A few hours and lots of hard work (by my kind, kind husband) later that bed now resides in our once again unparkable garage.