Showing posts with label lighting. Show all posts

Tuesday, September 18, 2012

An Easy Upgrade: Changing Outside Lights

Well not super duper easy but easy enough that I could watch a few YouTube videos, read a few tutorials and put on my electrician's hat to get it done. Maybe that hat would be one of those cool hats that you could buy at King's Dominion (a theme park in Virginia). The hat had a great purpose- keeping the sun off your neck. In 1993 a hat like the one below with "Anaconda" airbrushed on it was one of the coolest things you could own. 


Photo of the awesome "flap cap" from here

If I were to become an electrician or go back to King's Dominion I would invest in such a hat.


Back to my easy (but not super duper easy upgrade).

The outside of my house had two random light fixtures.  The only thing that matched was that they were both an ugly, gold color.  So, I bought two matching outdoor light fixtures online for $35 each.  Then I used these instructions that detail how to change them out.  It was pretty simple.  The first step and hopefully most obvious step is to turn off the power at the breaker box. 

Also, please realize that this job is best suited for an electrician.  Since, like me, you are probably not an electrician if you decide to change light fixtures on your own, use a ridiculous amount of caution. It would probably help to wear your electrician's hat too.


Number One Switcheroo: I changed this light on the back deck:


to this one:


Number Two Switcheroo: Here is the old light that was on the side of the house:


 The light is also seen in the background here where I am playing hop-scotch on the deck boards back in '07.


 Here is the new light!


Voila! I am an electrician (but once again... I am really not, even when I wear my cool hat). 


There is a theme park just outside of Charlotte, called Carowinds. It is EXACTLY the same as King's Dominion but they call all of the rides the wrong names. Also, King's Dominion has a miniature Eiffel Tower and Carowinds does not. If Carowinds had it they would probably call it something stupid like the The French Shorty. 

A list of my favorite rides at King's Dominion and what they call them at Carowinds:

  • Shockwave (Vortex)
Photo of The Shock Wave- the first standing roller coaster at King's Dominion from here
  • Anaconda (Carolina Cyclone)
  • Rebel Yell (Thunder Road)
  • The Hurler (The Hurler). I guess this Wayne's World themed ride was hip enough to keep its name at Carowinds
photo of Wayne and Garth's party time, excellent roller coaster, The Hurler from here


Thank you mom and dad for all of the King's Dominion season passes! Thank you, mom, for driving my friends and I there all the time and then waiting out in the parking lot reading a book.


Friday, September 14, 2012

Fresh, Light, Beautiful Kitchens

I got all excited about the idea of fancying up a kitchen recently. Thoughts were running through my head of redoing the cabinets, changing out the lighting, the flooring, counters, sinks, adding a back splash, fruit bowls, everything.

I began looking at some beautiful kitchens for inspiration. Well guess what! I am going to let you, my friends, in on the fun!

I love a bright, open-feeling, kitchen with lots of light!

Here are 19 examples from some hard-working, talented folks.
This one reeled me in with its beautiful grey walls, the gorgeous greens outside and the wooden beams. This wonderfully-windowed kitchen is from here.
Look at those subway tiles! Look at those glass cabinets! I'm ready to move in. The photo is from these talented folks.


I love the vaulted ceilings on this one and the long bar. These are the fireplace lovin' people who I borrowed the photo from.

This is a house I could imagine growing up in. I would be doing my homework at that island (at 2am because I am a terrible procrastinator). I would be making my pierogies on that stove. I would be breaking those pretty bowls and plates by spastically trying to juggle the oranges. Check out the bead board backing to that bookshelf!


This is one bright and modern kitchen. If I lived here I would definitely feel like I was vacationing in Stockholm but I don't see any problem with that!


Hello backsplash! What a pretty thing! I wish I could see what they are hiding in that open area under the sink. The photo is from these sneaky people.


Add bright yellow into any room and I will be a happy camper. I love how they have cabinets all the way up to the (very tall) ceiling. No wasting here! What a lovely, airy door! This photo is from these  yellow-lovin' dudes (probably dudettes too).


This kitchen has combined lots of different styles and they have done it well. What a fresh, light, beautiful kitchen. Photo from here.

WHAT IN THE WORLD! Who has a view like that? Why have I not been invited. To the people who own this kitchen: Yes, I accept your invitation.


LOVE the industrial look mixed with the calming blues and the awesome backsplash. This is the kind of kitchen where you have a good time making deviled eggs (?) just like the folks above. Photo borrowed from here.


SMART PEOPLE! See through cabinets when you have a nice window and lots of light on the other side of them. Adding some subtle grey tones and beautiful pendant lighting certainly didn't make me turn my nose either. This beaut of a kitchen was found here.


Clever! I am very impressed at how they were able to make this tiny kitchen feel so big. Those floors are driving me wild! Drool-worthy floor photo from here.


How lucky to have two windows in a fairly small kitchen. The bar really opens the space up! I love the wood counters! Photo on loan from here.


What a neat grouping of bottles at the top right of the page. That space is perfect for it. I love that they used a vintage-looking cabinet for the wet bar. Once again, I am digging the back splash on the back wall. This lovely space was found here.


Bead board bead board you are nifty! I love the idea of having a shelf stop right at the top of some tall, bead board wasinscottng. This fresh kitchen was found here.


This one is not exactly fresh and light but it is beautiful. AND look what I see hiding on the left side of the picture. I think I see a loft!!!!! Photo from here


Ohhhh la la! That FLOOR! That ceiling! That beautiful pendant light. This kitchen is wonderful! They even snuck a bunch of my favorite color, green, all over the place. Image from here


This one is a bit country and  a bit shabby chic. All of the light and the wood ceilings are what caught my eye. I do love some yellow and grey too- those are some funky cabinets! Image from here

Last but certainly not least is the gorgeous kitchen from the the clever folks over at Young House Love. They magically turned a dark, wood-paneled, claustrophobic eating factory into this fresh, light, and beautiful kitchen. Image from here.

Our kitchen at our current house is just fixed up enough that the anti-waster in me would be very upset about changing anything. I really like our kitchen and boy oh boy do we have a beautiful view (with lots of windows to show it off). 

All of these fresh, light, and beautiful kitchens have got me itching to get my hands on a real fixer-upper.


Saturday, September 1, 2012

Beautiful leaves and more light!


I have not introduced you to the beautiful views and trees that came with my house. I don't want to overwhelm you with too much beauty at once. Let's start slowly.

On my deck I have a hammock that has a canopy of trees over it.  One day, I was lying on that hammock and realized how beautiful the leaves above me were.  So, I started taking photos and got some really neat ones of the leaves.


Our living room had no overhead lighting when we moved in. The ceilings are maybe about 18 feet tall and it can be a darkness factory in there at night.


Scott came up with the idea of putting a light on one of the highest walls in the living room. We wanted spot lighting so we could light up different areas of the room. So I looked around and found what I was looking for at Lowes. I bought one bar that you can attach a whole bunch of fixtures to. The bar is black and I chose five black lights to go with it. 

I don't have a very good before photo but the top right hand corner of this photo is where the light fixture started.


Here it is from another angle


We have a handy man (actually, he is more than a handy man. He can do ANYTHING house related. He does it all perfectly. We are some serious lucky ducks finding him). He figured out a way to pull the electricity from a different room and connect the light with a remote. It is perfect!

Presto! We now had a well lit living room and a new area just aching to have some art on it.


How I made my leaf art:

  1. I bought eight large black frames that are not meant to be picture frames. There are meant to have fabric stapled to them.
  2. I painted them black. 
  3. I bought some foam board and cut it to fit in the frame.  
  4. I picked my four favorite photos and made about twenty copies of each one.
  5. I cut pieces of each photo into 128 equal sized squares.
  6. I glued rows of four equally spaced onto the poster board.  
  7. I spent a long time making sure all of the frames were spaced evenly in all directions on the wall. That was the hardest part.

Here they are in all of their green glory


Wednesday, August 29, 2012

Dining Room Oak Party


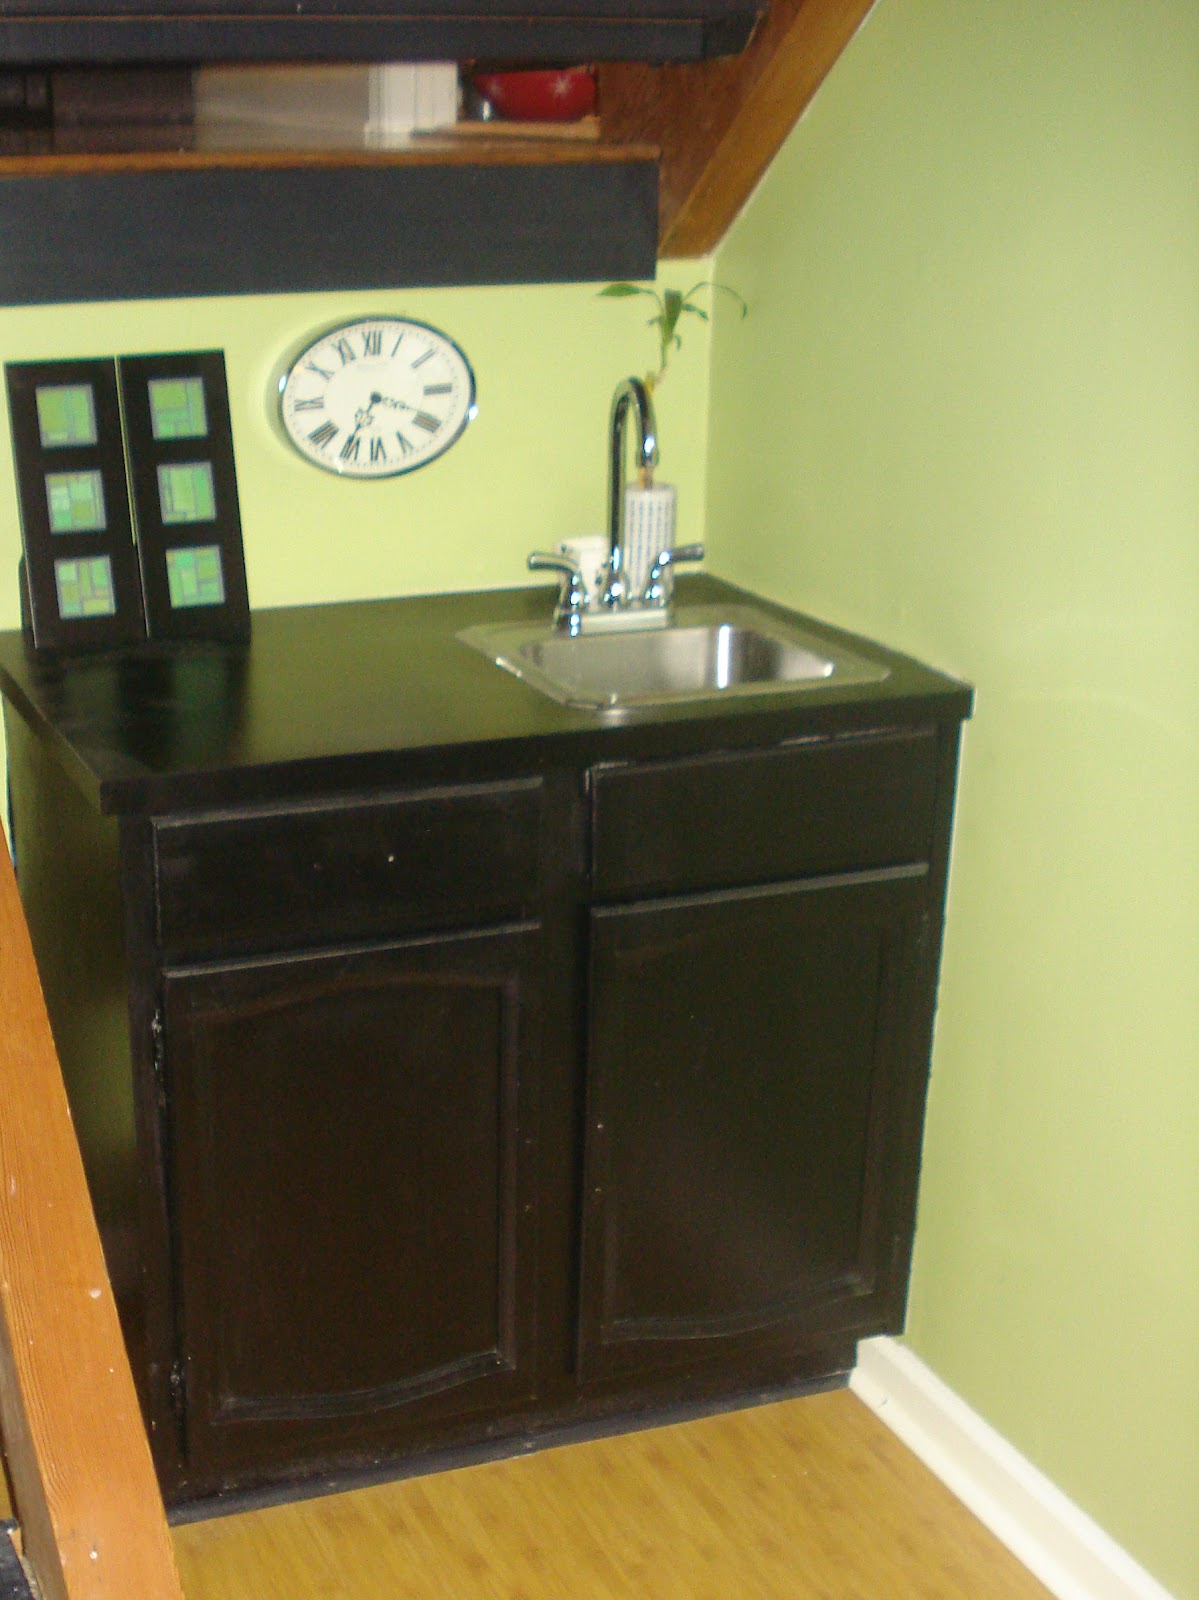
Oak cabinets and I are not really pals. You may have figured that out from the post that I wrote about ugly 80s cabinets (the ones with the good lookin' oak trim). The beautiful, wonderful house that I moved into four and a half years ago came flying some serious oak cabinets! We will start our oak tour in the dining room. It came equipped with a sweet wet bar straight from the 70s with all the oak you could ask for.  The top was a strange, orange vomit color with random swirls.


Hello my new pal Glidden Gripper.  It is a primer that you use on slick surfaces and it really grips.

  • I lightly sanded the cabinets
  • Painted on the Gripper
  • Then painted black over the Gripper

Now, it is a lovely home for my board games.


The other big change in the dining room was changing out the spot lighting used for the previous owner's sword collection to a more appropriate chandelier.


I found a chandelier that I loved. The only problem was that it only came in bronze. So, I spray painted it black.


I bought the table from my favorite store- Craig's List.  It was painted a similar green to my walls.  So, I primed and painted away.


Then I added three green table runners (my mother in law had sewn a ton of these for my wedding and I was happy to reuse them) topped with three bamboo table runners, and some cool napkins from Target.  I bought a couple extra napkins and framed and matted them because I loved the pattern so much.

The black and white art was a construction DIY. I was painting a baseboard and I had it resting on my knees. It kept leaving long white stripes on my jeans. I do not like waste but I do like random lines on canvas. So I grabbed a  few canvases and quickly painted them black. Then I laid the baseboard on top of the canvas and let the mess I was making on my jeans turn into art.

I hung the art on the wall and decided it needed a little something else. So, I painted a rectangle of green that was a couple shades darker than the wall color and hung the art back up. Tada! Instant framing!

My mother in law sewed the valance for me out of a shower curtain.


And that, my friends, is what I call the dining room oak party!