Today we get to take a look at some before and afters. There will be at least two before shots (one before we moved in, one when I added the "funky retro" to the bonus room). The after shots are photos that were taken while the house was on the market, after it had been de-funkyed, de-retroed and lots of neutralization had happened.
Tomorrow I will talk a little about how I like to decorate open shelving. And tell you a bit more about some of the changes we made. I am telling you now... fascinating stuff. I dare you to see if you can wait until tomorrow!
Let's get started!
The Big Window: Before we moved in:

The Big Window: A little funky retro, but pre built-ins:

The Big Window: On the market time:

The Closet Wall: Before we moved in:

The Closet Wall: Funky Retro:

The Closet Wall: After furniture reconfiguration:

The Closet Wall: On the market:

The Other Window Wall: Before we moved in:

The Other Window Wall: A little funky retro:

The Other Window Wall: A slightly cleaner look to the funky retro (the two photos below = the whole wall):


The Other Window Wall: On the market:

Up The Stairs: Before we moved in:

Up The Stairs: Funky retro:

Up The Stairs: A bit different in the background:

Up The Stairs: Funky retro (the other side):

Up The Stairs: On the market:

The Speaker Wall: Before we moved in:

The Speaker Wall: Stage 1:

The Speaker Wall: Stage 2:

The Speaker Wall: Stage 3:

The Speaker Wall: House on the market:
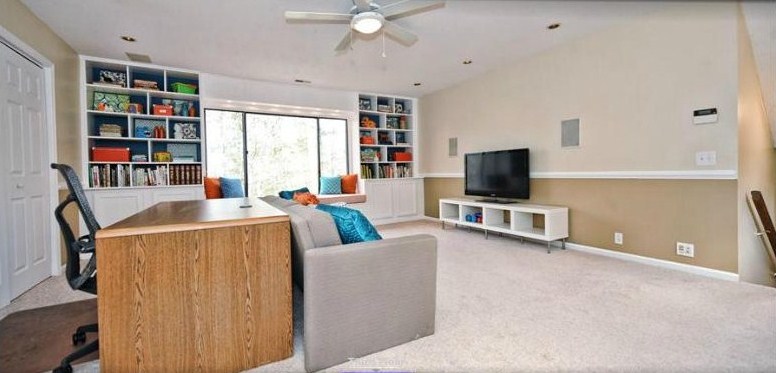
The Other Side Of The Closet Wall: Before we moved in:

The Other Side Of The Closet Wall: Funky retro:

The Other Side Of The Closet Wall: On the market:

I hope to see you back here tomorrow to wrap this puppy up!
Here are the steps that got us up to this point:
The Bonus Room Chronicles Introduction Post
Step 1: Move in. Paint the walls. Put up curtains. Put up art. Paint orange design. Paint polka dots.
Step 2: Put up wire display.
Step 3: Put up wall of frames.
Step 4: Move furniture around. Get rid of TV. Add bed.
Step 6: Change out the bifold doors
No comments:
Post a Comment