Friday, January 25, 2013

OO: 10 Outstanding Office Oraganizing Tips

Organization Overhaul time is here on this lovely Friday morning!

We are going to be checking out some outstanding offices today! 

  • You know that I love to maximize my storage space. People sometimes call me "Laura Uses-Vertical-Storage-Space-Like-A-Champ Spencer."
Get to it! Make the most of your wall space by going vertical. Get to storing!


  • This will not be the first time that I have told you that things look more organized when they are in pretty boxes or container. So, splurge on some matching containers from Ikea, The Container Store or wherever. You could also wrap them in burlap, wrapping paper, scrapbook paper, or modge podge photos of your best friends all over them. Whatever you do- if you store your stuff in the open make sure it is something you will smile at when you see it!
FYI- you are not required to get a computer monitor from the 1980s just because you have nice matching boxes.


  • Cords, cords, cords. Go wireless and cordless where you can. When you can't, organize the heck out of them so they don't get knotted up and hidden and terrible all around!

Label each cord on a bread clip.

Use binder clips to make your cords accessible. 


  • Make a desk or office area that fits your needs. 

If you only have enough space to fit your desk in a closet that is just fine! Look how lovely it can be!

DIY your desk out of 2x4s and storage cabinets. This way you can make it fit exactly where you want it.

 You could definitely DIY this desk too. I think it is a pretty sneaky one!

  • Label everything! I ALWAYS have random receipts or papers floating around that are important but don't have a home. This is the perfect solution. Get some binder clips and label them. They can now be the catch-all for your important floater-documents!


  • Beautify even more! Don't just pretty up your storage boxes. Keep that double sided tape or glue stick going to your pen collection.

  • Keep the things you use most accessible. 
You could use a peg board. Or clip boards.


You know that's right... pretty those clip boards up!


  • Keep a list of the addresses you send to most next to your address labels, stamps and cards.
  • Sync your calendar with other people who might need it.
  • Last, but never ever ever least... back up, back up, back up! Please go do it right now! Back up all of your important computer documents and photos before you accidentally spill your water all over your computer and lose it all!

How is your office looking these days? Do you have the lovely organized boxes that I dream of?


Thursday, January 24, 2013

Cookin' With Chris: Fried Beet Stems & More Yummy Food!

What is greasy, red, and was made on a whim?

You guessed it... fried beet stems!


Beets are the yummiest thing ever! Australians have known this forever. They put beets on everything (or it seemed that way whenever I would visit).


I have just developed a love for beets over the last couple of years. It has been a fast and furious love. I was buying them from the farmer down the street like they were going out of style.


I bought some recently and my resident chef (Cookin' With Chris, himself) cooked them up. We like them sliced, olive oil-ed, salted and then thrown in the oven for a while. Yummmmmmmmmmmmm!

Isn't this photo itself beautiful? Beets are the best!

Usually, we chop up the beet stems and thrown them on a pan on the stove with some olive oil. But Scott decided to go wild today and try something he'd never even heard of before... FRIED BEET STEMS.


The ingredients for the frying:

  • Beet stems
  • Half a cup or so of corn meal
  • 2 eggs
  • Some vegetable oil
He washed the beets; then cut them into around 4 inch lengths.

You're welcome for the awesome photography.

Next, he dipped them in the eggs.

Then he dropped them in the flour for a second.

Now, it was time to throw them in the ol' fryin' machine. Then he added a little salt while they were cooling off.

Scott made a dipping sauce out of yogurt, honey, and peanut butter.

I stirred it up while I stared at my cute sleeping little baby.

The dip made a wonderful breakfast the next day, but a TERRIBLE fried beet dipping sauce.

So, Scott moved on to option number two: ranch dressing. It was perfect!


This isn't over yet! There was one more part to the beet that hadn't been used yet. Scott wasn't interested in playing another second of the anti-waster game. So, I washed the beet greens, trimmed them up a little, and steamed up on a pan on the stove. When they were done I chopped them up and ate them with rice.

Woo hoo! We did it! We used every bit of that beet.

Would you like to know what else Chef Cookin' With Chris made for dinner?
He made some delicious kale chips. 
Once again, sorry for the terrible photography.

He also made a smoothie made of frozen berries, yogurt, almond milk, bran, a banana, and pineapple juice.

There you have it- another episode of Cookin' With Chris!

FYI- I am not claiming this to be a healthy meal just because it involves beets. It was a big frying fest- not healthy at all. Probably slightly better than fast food french fries, though.

Wednesday, January 23, 2013

OO: More Closets

A couple weeks ago, I showed you the before and after of my master bedroom closet organization. Then, I introduced you to my husband's underwear drawer. It was weird, but it happened. Let's move on.

Today, we are going to check out some beautiful organized closet love and one of my Organization Overhauled closets.

Ahhhhh! Just add a lovely color to the background and it instantly becomes beautiful!
It certainly doesn't hurt that it is super organized and has some adorable dresses.

Here are a couple of kids closets with fancy paint and wonderful organization.

It is time to take a look at a very well organized walk-in. I did a little detective work and I find it a bit hard to believe that the owners of this closet only need to hang up 12 items, but have at least 15 pairs of shoes.

Don't you worry, this one appears to have the appropriate ratio of hanging items to shoes.

And one more kids closet. Very fancy!

Now, for your viewing pleasure, here are 3 closet tools that I'm into:
Dividers for things like underwear and socks.
ps this is not my underwear drawer.

Put tension rods up in hidden spaces in your closet for things like scarves and belts. 

Another drawer divider.
One more tip: roll t-shirts so you can see more of the front, so they don't wrinkle and so they fit better.


Are you ready for some before and after action?


I took the cards I use the most and put them in a very accessible spot. They are in fruit baskets that my sister brought me from Michigan because she knew I would be able to use them for something. Good thinking, Kelly!

It has been a couple of days since Cora was on the NL scene and I have to keep the grandparents happy. So, here's my little apple-eater.


Ahh! It isn't over yet. Make sure you answer...

Wednesday's Weekly Would You Rather Question:

WYR...

have terrible nightmares every single time you sleep, but wake up feeling refreshed
or
wake up feeling tired, but you had wonderful dreams?

Tuesday, January 22, 2013

The Bonus Room Chronicles: Step 5: Part 2: Window Seat & Built-In Bookcase

The Bonus Room Chronicles are back. You have seen step 1 through 5, but we are stuck on step 5. Last week, we checked out the first half of the window seat/ bookshelf building process. It is time to make our way into step 2.


Last week, I left you here:

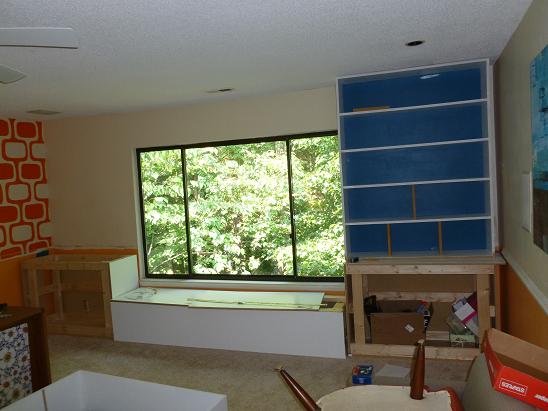
The frame was built. The shelves were built, but they hadn't become buddies yet.


PART TWO TIME!
It was time to acquaint the cabinets with their soon-to-be buds, the shelves. 
The bookshelves are 4 feet wide. After building them we decided they needed some more support. So, we added some boards to the shelves that alternate- one board per shelf, two boards per shelf.

Then the frame for the top/ light box was built and put into place.
I am not sure why it looks like there is a snow storm in this photo or why Scott and his dad are doing such a thorough examination of the right side of the frame. But there it is- snow and exams.

More hammering. More snow.

A little fastforward... The bookshelves have been painted, the lights are installed. There is even some temporary staging of the bookshelves in place.
Hey Big Bear!

Time for the cover to go up on the top of the shelf.


To figure out what size doors we should get for the cabinets I made some door fakers.
Cardboard on top of cardboard.

The doors were delivered and we installed them.

We added some detail to the light box cover.

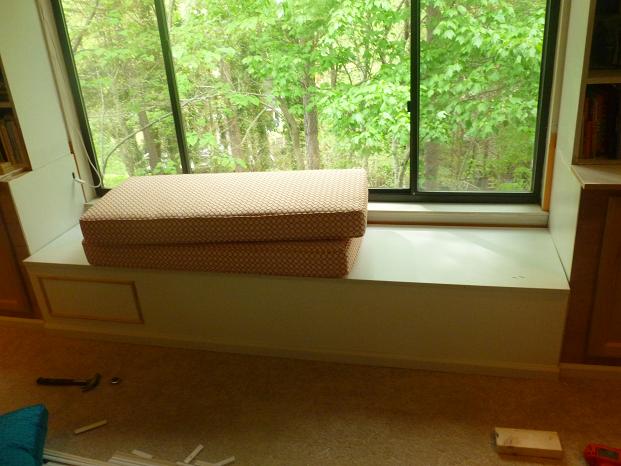
Detail was added to the window seat.


And that is where I am going to leave you. Step 5 has turned into a 3 step process. But I promise you that very very soon you will get the big reveal.

Bonus Room Chronicles Step Team in full force below:


The Bonus Room Chronicles Introduction Post

Step 1: Move in. Paint the walls. Put up curtains. Put up art. Paint orange design. Paint polka dots.

Step 2: Put up wire display.

Step 3: Put up wall of frames.

Step 4: Move furniture around. Get rid of TV. Add bed.

Step 5: Part 1. Part 2. Part 3: Build window seat and built in bookcases.

Step 6: Change out the bifold doors

Step 7: Part 1.  Part 2. Part 3. Finishing touches