Showing posts with label cora. Show all posts

Monday, May 27, 2013

Happy Memorial Day!

Happy Memorial Day!

I hope those of you who have the day off have a fabulous one! I will spend the day packing, packing, packing, packing. One week from today we move everything out of our house. We are still going to spend the night in the house (camp-out style with no beds or anything) because it makes me sad to think that we could have spent an extra night in our sweet old house and we didn't.

It is all starting to hit me. We are about to leave the house that we lived in when we got married, when I had Cora, when she took her first steps, and said her first words. What makes this all even harder is that Cora is getting sad about things getting packed away or taken down from the walls. Every day, she points to where a picture of a llama hung on the wall and says "llama gone" in the saddest/ cutest voice you've ever heard. Then I say, "I know the llama is gone, but we will see him again." She starts nodding like she knows everything is going to be OK and says "Dav Dav" meaning we will see the llama again in Davidson. Then we repeat this process with the penguin, the duck, and the pig. Aha! As I am typing this I just figured out that she is talking about her piggy bank. I had been trying to convince her that there was no pig picture in her room.


And, now you know the three most important things in Cora's room. I didn't know they were favorites until they were gone.

We stopped by our new house to check out the progress for a quick second yesterday and Cora picked out where the llama, the penguin, the duck and the pig would go in her new house.

Here she is checking out the ceilings with Scott.

The good news for Cora about us taking everything off the wall is that the chalkboard in her room is temporarily at her height.

Here is one more Cora photo to celebrate Memorial Day (let it be known that this photo has nothing to do with Memorial Day). On the way up to see our new house, we saw a random dog in our neighborhood that looked like it didn't belong. So, I stopped and checked its tag. Sure enough, it was from a nearby neighborhood. The dog was SUPER DUPER friendly and Cora thought it was pretty fantastic that we got to hang out with the dog until his owner came.
ps this photo doesn't show off the dog's happy personality. I promise he was a sweetie.

The Memorial Day fun isn't over yet. I have a few shout outs:

Happy birthday to my BFF, Sandra Dee!!!!


Congratulations to my dad and my sister for finishing their walk on the Camino de Santiago. They went to Spain and walked about 200 miles in less than 3 weeks. You can follow the adventure on my dad's blog, Young Codger!
Here they are walking on the camino. They hit a bit of a snow storm, but for the most part they had pretty nice weather.

I hope to be back with a full post tomorrow!

Monday, April 15, 2013

The Nursery Chronicles: Steps 6: Refinish Side Table, Add Ottoman

The Nursery Chronicles are coming on strong. You got one last week, one is in your face right now, and you can expect another one later this week. 

In Step 6 I will show you the side table that we refinished. But that is not all... you also get to see an ottoman come to town!

Side table:
You have seen the side table live in the bonus room au natrule. But, as you may have realized by now, I love to add a little paint to things.

My lovely lovely husband did a bit of sanding and then adding a couple coats of white paint to the top and sides of it.

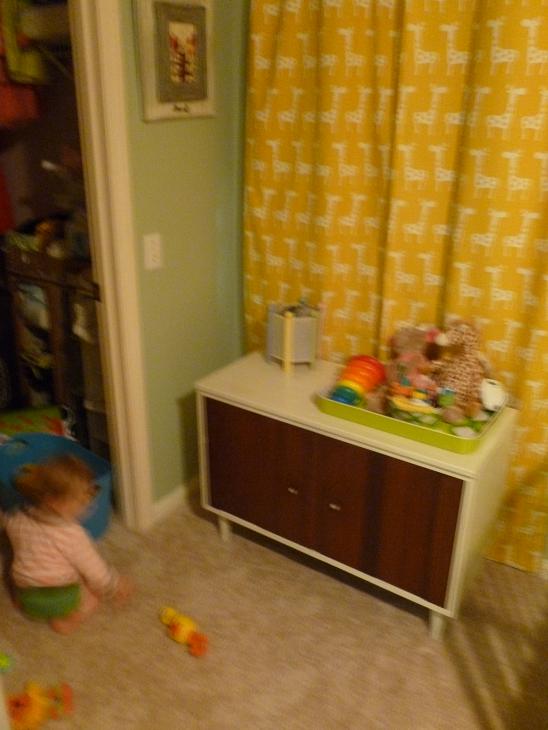
Here is how it turned out:

Here is a less blurry, less cluttered photo:

Ottoman:
We also added a ottoman because I had heard it is important to have something to put your legs up on while you are nursing. It turns out that I hardly used the ottoman until I discovered that I had a bunch of unused storage space.  (<-- ps check out this link if you want to see some cute photos of a really happy Cora in a bucket!)

Actually, that is not completely true about the ottoman not getting any use... for some reason my mom and I decided that it would be a normal (and totally safe) place to take photos of a 3 day old baby.
It should definitely be noted that there were hands just outside of the camera's view waiting to catch a baby on the move.

So, here it is: a green ottoman that I believe was purchased at Target for about $20.


The Chronicles of my baby's abode are almost complete! Only 4 more steps to go! 

Step 1: Get rid of the old furniture and try out some more baby-centric duds for the room. Crib, bookshelf, and daybed.

Step 2: Convince my husband to do more painting than anyone would ever want to do in their whole life. Start the painting spree by painting over the headboard on the wall. Get a dresser/ changing table and refinish it.


Step 3: Get some more furniture. Start the decorating: Wire display for pictures.


Step 4a: Put up the book slings.


We  made it 3 whole steps before I divided one up. Yes, I'm very sorry. I had to add a part a and part b to Step 4. It was getting a bit long. So, now you get to enjoy it in 2 parts.

Step 4b: More decorating: Floating shelves.

Step 5: Decorations, Part 3: Hang art above the crib and all around the room

Step 6: Refinish side table and get an ottoman


Step 7: Paint the chalkboard and mirror and hang them.


Step 8: Put up the curtains. Line the inside of the dresser with some of my extra fabric


Step 9: Finishing touches.


Here are some photos of the rest of the nursery!


Sunday, March 17, 2013

Birthday Numero Uno! Part 3!

Happy St. Patrick's Day to you! Go get your green on!

Welcome back to 1st birthday celebration time! It was the simplest celebration you can imagine. So, you may wonder why it takes me 3 posts to finish it up. Because that is the way I roll people; that's the way I roll. 

In our first glimpse into Cora's birthday party, I showed you the things that were not at her party (creepy clowns, above-ground swimming pool, chocolate pizza). In part 2, we took a closer look at what actually did happen at her party. Now, in the 3rd edition of Birthday Numero Uno, I am going to show you the decorations aka BANNERS GALORE!


I made a fancy contact-papered Happy Birthday, Cora sign that I will put up every single year forever... even when she is out of the house. That sign will be up and I will spend the whole day looking at The Etc. Lists and all of my favorite photos of her. #creepymomtakeachillpill


Let's get on with the show. 
Here is how I made the contact-paper-infested banner:

  • My best friend, scrapbook paper, entered the scene and got cut to pieces. It took me forever to decide what size each piece should be. Finally, I decided to choose what size I wanted the letters to be and then it was easier to choose the paper size. I made a template of the triangle, traced it, and cut it.

  • For the letters, I looked at some fonts online and just hand drew them on thick pink paper. I played around with them a bit and realized they looked better with one more layer. So, I cut out a piece of letter-shaped white paper that was a bit bigger than each pink letter. FYI- when I say "I" I mean me and my wonderful mom who gave up her evening to sit on the floor with me and cut out letters.

  • The layout was the trickiest part, but also the most fun! I spent at least an hour moving all of the papers around until I found the perfect order.
  • Next, I added the contact paper so it would stand the test of time! Then I punched holes in the top corners of each triangle and looped some green ribbon through the whole thing. I added a pretty yellow ribbon to each end and Bam Boom Bam! It was done... about 10 minutes before the party!


Hold your horses, folks, there is more! THERE WAS ANOTHER BANNER! Craziness, I know!
I took a weekly photo of Cora during her first year. I picked about 20 of my favorites and turned them into a banner. I cut scrapbook paper into thirds. Then I glued each photo on a sheet and added a little title box that said what week the photo was from. Contact paper time. Then hole punching and ribbon stringing.
Tada. All done!


Here are a couple close-up shots of the banner.


There was also crepe paper streamers and tissue paper balls! Check it out!


As a favor, we gave out coloring books that we made with a bundle of 5 crayons wrapped in green raffia.
This was the cover:

And that wraps up Cora's very simple numero uno birthday! Less than 6th months left until Cora hits numero dos!

Saturday, March 16, 2013

A New Post Is Up On The Etc. Lists!

Happy Saturday! Never Listless is laying low today, but things are pretty pretty pretty exciting over on The Etc. Lists... especially if you are interested in checking out the 3rd installment of my favorite photos from Cora's 9th month.


Friday, March 15, 2013

The Nursery Chronicles: Step 4a: Book Slings

Welcome back to the 4th fabulous edition of The Nursery Chronicles! Today, is a fun one. I think so, anyway! We are going to be talking books and how to hold them. 

Let's get this party started with a look at the awesome book sling that inspired me.

Anyone who has read this blog more than a few times ought to know that I am a major lover of kid's books. So, when I saw this awesome book hanging fantasticness I knew that Cora had to have it in her room. I followed the tutorial that Megan posted on her blog, Penny Carnival, which is also where I got the image above from.

My little how-to is not nearly as complete as hers, so if you want to make these yourself please follow her instructions.

Step 1: Buy your supplies: double curtain rod brackets, wooden dowels, and fabric. 
Put up the hardware. We mounted the brackets with anchors rather than in studs because I wanted the slings in a specific location and there didn't happen to be any studs there.

Step 2: Cut and iron your fabric. We used no-sew tape because I am the worst sewer in the history of the world.

Step 3: Push your dowels though the holes in your fabric slings and then put those fancy things on the brackets.

Step 4: Admire your work! 

Did anyone happen to notice that I only wrote steps about the photos I had and skipped some of the important parts? Lucky for you I gave you a link to someone who did a much better job explaining it. Don't forget to read Penny Carnival for better instructions!

Here's the finished product! 

And, a couple more:


We have made it through 4 whole steps in this baby abode. 6 steps until the grand finale! 

Step 1: Get rid of the old furniture and try out some more baby-centric duds for the room. Crib, bookshelf, and daybed.

Step 2: Convince my husband to do more painting than anyone would ever want to do in their whole life. Start the painting spree by painting over the headboard on the wall. Get a dresser/ changing table and refinish it.


Step 3: Get some more furniture. Start the decorating: Wire display for pictures.


Step 4a: Put up the book slings.


We  made it 3 whole steps before I divided one up. Yes, I'm very sorry. I had to add a part a and part b to Step 4. It was getting a bit long. So, now you get to enjoy it in 2 parts.

Step 4b: More decorating: Floating shelves.

Step 5: Decorations, Part 3: Hang art above the crib and all around the room

Step 6: Refinish side table and get a few more pieces of furniture


Step 7: Paint the chalkboard and mirror and hang them.


Step 8: Put up the curtains. Line the inside of the dresser with some of my extra fabric


Step 9: Paint the mailbox/ stuffed animal house. Finishing touches.


Here are some photos of the rest of the nursery!


Do you need a little more Chronicle in your life? Check out The Living Room Chronicles, The Bonus Room Chronicles, and The Master Bedroom Chronicles!

Sunday, March 10, 2013

A New Post Is Up On The Etc. Lists!

It is time for another edition of Best Of Cora Photos over on The Etc. Lists!
Click here to check out Cora's 9-10th month.

Monday, March 4, 2013

Updating The Deck Deck Goose, Part 2

Hey Monday Maniacs!!! Welcome back to another edition of ol' Never Ever Listless! Last Friday, I left you hanging in some major suspense about what other exciting updates I made to the deck and what oh what I learned about spray painting terracotta pots. Today is the day that I reveal it all!

I showed you the pallet table I made, and the pots that I spray painted yellow. When I was buying the spray paint I saw some perfect yellow pots for $6 but the spray paint was a few dollars cheaper and I really wanted to reuse the pots that I already had. So, spray paint was bought and pots were painted.

See the fancy pot situation below.

Look at those lovely pots just gleaming away near my little leg chub sweetie.
And, seriously, check out all of that beautiful green! It is like we are living Swiss Family Robinson style! How could we possibly leave this place?

Onto the terracotta mess that I created! It turns out that there is special spray paint for terracotta pots like this one. I did not notice those spray paints and went with Joe Regular Spray Paint. Well., it didn't work. About 1 month later the pots looked like this:

Not only did poor Alberta Spruce (in the middle) lose all of her yellow, but I also managed to just about kill her completely. My thumb is not green. It is yellow from all the flaking spray paint.

I went back to the store and picked up 2 of those pre-yellowed pots that I was eyeing on the first go-round. 

I said the Spruce's time of death and transplanted the other two.

Much better!!!

Don't click away just yet! There's more! I also got new outdoor pillows and a new camera! Overstock.com had a pretty good discount code going a few weeks ago and I used it on some already-inexpensive pillows. Here they are!

Spring flowers even popped up to check out the cushy new seats. 


I also updated something else! My camera! Wooo Hooo! I got a DSLR. I just have it set on auto right now and I'm sure it will take me some time to figure it out, but check out this photo of my babytoddler. Better quality?

Does anyone have any tips for me when learning how to use a DSLR?