Let's visit the lovely world of chronicles, Nursery Chronicles, that is.
It is time to do a little art talking. Cora's nursery was definitely not lacking decoration. We have already gone over the book slings and the Dignitet wire display. Now, we get to look at all of the other art around the room!
Framing up some squirrels!
I printed out a picture of 2 squirrels having a tea party that I found online for Scott a long time ago. Actually, it turns out the squirrels are drinking wine, but I originally thought it was a tea party. The picture was laying around when I was trying to figure out what should go in this awesome frame and the squirrels were a perfect fit! The beautiful frame was made by my incredibly talented friend, Angela. She gave one to each of her bridesmaids as a thank you for being in the wedding.

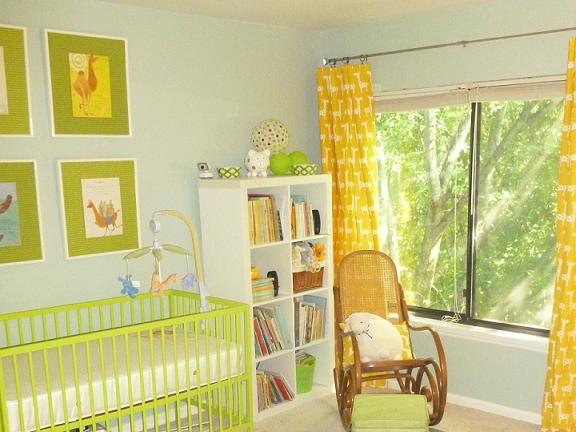
Art above the crib!
I have a pretty enormous collection of extra frames in the "decoration supplies corner" in my attic. So, I went strolling through the aisles to find something that would work above Cora's crib. I found 4 plain white frames that my father-in-law was going to get rid of and I happily took off his hands.
I took the glass out of the frames since they were going right above the crib. As Cora got bigger, I pulled the crib farther and farther away from the wall and into the middle of the room so the frames would make it through those busy and destructive hands. Now, she is at a stage where she doesn't feel the need to try to destroy everything she touches so the crib made its way back home.
I hate hanging frames. I especially hate hanging frames when they are hung with wire and I am trying to make a few frames level. I realized that I could take the insides out of these frames to make hanging easier. So, thats what I did.

I am about 6 months pregnant here.
I found a kid's book called The Wild And Woolly Animal Book by Nita Jonas with pictures by Dale Maxey. The illustrations are awesome! So, I picked out 4 of my favorites and centered them on top of some green fabric. Here is how it turned out.

Ignore all of the random things happen in the crib. This was months before Cora's arrival. I promise we don't usually leave hammers in her crib.
The Pom-Pom Art!
I am of the mindset that the more on the wall the better. So, of course I made sure to fill the space above Cora's bookcase. That was prime real estate.
I put a few frames, but it didn't work. I just wanted to see if the configuration worked so I didn't worry about putting pictures in the frames.

Then I tried some leftover decorations from one of my lovely baby showers, but it didn't quite fill the space properly.
My very crafty and thoughtful friends made some adorable tissue paper balls for the shower they threw me and they used the colors of Cora's nursery. I put them up and liked it!

We are getting closer and closer to checking these Chronicles off our list! Here is a list of the steps that we have gone over so far and what we have left:
Step 1: Get rid of the old furniture and try out some more baby-centric duds for the room. Crib, bookshelf, and daybed.
Step 2: Convince my husband to do more painting than anyone would ever want to do in their whole life. Start the painting spree by painting over the headboard on the wall. Get a dresser/ changing table and refinish it.
Step 3: Get some more furniture. Start the decorating: Wire display for pictures.
Step 4a: Put up the book slings.
We made it 3 whole steps before I divided one up. Yes, I'm very sorry. I had to add a part a and part b to Step 4. It was getting a bit long. So, now you get to enjoy it in 2 parts.
Step 4b: More decorating: Floating shelves.
Step 5: Decorations, Part 3: Hang art above the crib and all around the room
Step 5: Decorations, Part 3: Hang art above the crib and all around the room
Step 6: Refinish side table and get a few more pieces of furniture
Step 7: Paint the chalkboard and mirror and hang them.
Step 8: Put up the curtains. Line the inside of the dresser with some of my extra fabric
Step 9: Finishing touches.
Here are some photos of the rest of the nursery!


And it all paid off because Cora loves her nursery and so do all the homebuyers!
ReplyDelete