Showing posts with label nursery. Show all posts

Wednesday, May 15, 2013

The Nursery Chronicles: Step 8: Put Up The Curtains, Line The Dresser

I am trying my best to wrap up all of the chronicle series before we move out of this house. Right now, we are one down and three to go. 

I am sorry to tell you that this particular step is not the most exciting one, unless you consider giraffe fabric exciting. In which case, you are going to go BONKERS over this post!

The last time that The Nursery Chronicles graced your eyes, we were painting things yellow and hanging them on the wall. This time, we are hanging curtains and lining dressers.

Curtain Hanging:
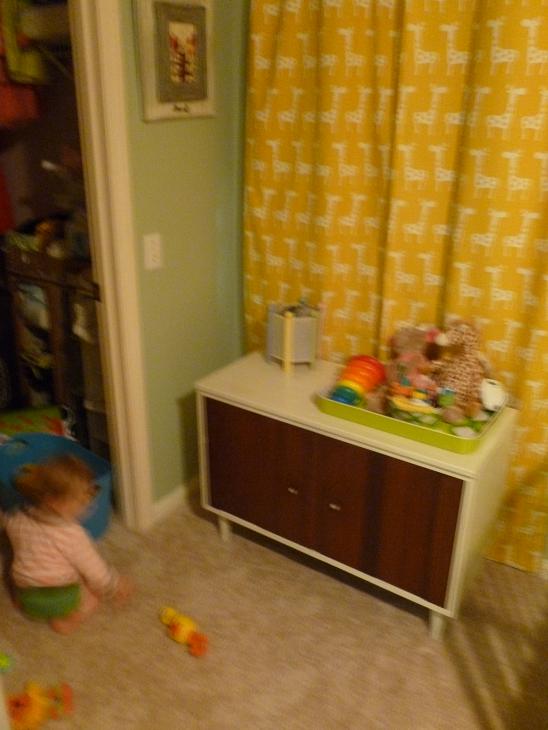
I didn't take photos of the actual process so you just get the before and after. After many trial and error lessons learner we now get the curtains before hanging the curtain rod if that is at all possible. That way, you don't have to worry about the curtains being turning into high-water-pants. You can make them hang wherever you want!

Here you go... the before curtains and after on the right side of the room:


And, on the left side of the room:

The monkey heads resting on the curtain rods are funny hats that my BFF gave to me at my baby shower. She suggested we bring them to the hospital and wear them there. So, we did!
When we got home, we put them back on their curtain-rod-resting-place.

Drawer Lining: 
For this, you get a little photo run-down:

These are some pretty obvious steps, but you get them anyway. If you want to make your life even easier you can just get contact paper or don't line your drawers in the first place! I lined these because I had tons of extra fabric, I wanted the drawers to look pretty, and I bought the dresser off Craigslist and I didn't exactly trust a few spray downs to make it clean.

Step 1: (Thank you New Kids on the Block, every time I ever say "Step 1" I sing "you can have lots of fun). Step one, make sure your fabric is nice and straight and cut off any stringy edges.
Step 2: Measure the drawer and mark the fabric.
Step 3: Cut the fabric.
Step 4: Learn that there is an easier way to match up velcro than by using an intricate arrangement of strips.
Step 5: Put the fabric in the drawer and figure out the velcro arrangement from there.

Tada! Done!!

Ooooohhhh, but this isn't over just yet. Now, I would like to show you what lovely and talented ladies I have in my family! As I said earlier, my mother-in-law sewed the fantastic curtains that you just saw. 

My sister made all of the pillow covers! They looked professional!


My sister-in-law made Cora a super adorable quilt. I had tonsssssss of leftover giraffe fabric so she used that on one side and quilted some neat stuff on the other.


And, my mom, who is not much of a seamstress held onto every toy and book that her future grandchildren could possibly want. And, let me tell you, they (Cora anyway) LOVESSSSSS herself some 1980s Fisher Price toys. That is not my mom's only talent- she broke out her inner seamstress and made this funky rug-thing. It is more of a closet-wall-rug, in my opinion. But nonetheless, it is still cool. 


So, thank you to all of the talented women in my life who helped make Cora's room into the colorful baby abode that it is today. 

Here are the Nursery Chronicle step-diddy-do-dahs that got us to where we are now:


Step 1: Get rid of the old furniture and try out some more baby-centric duds for the room. Crib, bookshelf, and daybed.

Step 2: Convince my husband to do more painting than anyone would ever want to do in their whole life. Start the painting spree by painting over the headboard on the wall. Get a dresser/ changing table and refinish it.


Step 3: Get some more furniture. Start the decorating: Wire display for pictures.


Step 4a: Put up the book slings.


Step 4b: More decorating: Floating shelves.

Step 5: Decorations, Part 3: Hang art above the crib and all around the room

Step 6: Refinish side table and get an ottoman


Step 7: Paint the chalkboard and mirror and hang them.


Step 8: Put up the curtains. Line the inside of the dresser with some of my extra fabric


Step 9: Finishing touches.


And here are a few after photos from the nursery:


Friday, April 19, 2013

The Nursery Chronicles: Step 7: Paint & Hang The Chalkboard & Mirror

The Nursery Chronicles are back soooooooo soon! I know you're excited. I know what you want.

Today, we are jumping into Step 7, where you get to see a chalkboard and mirror get painted and go up.

Chalkboard:
There aren't a lot of things that pass through my house that don't get at least a swipe of the paint brush to them. This chalkboard/ magnetic board from Ikea (called Luns) is no exception.

That practical little guy was first hung on the wall just so we could check something off our list, but soon...


he ended up with a nice colorful yellow painted on him:

The writing on this board was waiting for Cora when she came home from the hospital. We didn't find out if Cora was going to be a girl or boy so we came up with some pretty awesome nicknames for her. For some reason Scott referred to the baby as "Toddles" while she was in my belly. My sister and I named the baby "Santa Sugarbaker" because when I was little I always said I would name my baby "Santa." "Sugarbaker" came into play because Julia Sugarbaker from Designing Women is an awesome sassy southern lady. "Hockpea" is a fake family name. For some reason, it has become a tradition that whenever someone is pregnant on my dad's side of the family we call the baby "Hockpea" until the baby is born. And there you have the run-down of Cora's pre-birth names.

Mirror Time!:
This frame had been hanging around the house for a while and had been used for all sorts of things. I had recently painted it brown and added a remnant of a big ol' bathroom mirror that we took down to it. I had not hung it yet, which made it fair game. The perfect spot for a mirror popped up in Cora's room. So it was decided... Brownie McGee was going to have a whole new life and a bright new color to add to her resume.

Here she is showing off her beautiful brown:

Then, we yellow-ed her up and turned her into this:

Mission accomplished! More yellow added to the room!

Step City is below:

Step 1: Get rid of the old furniture and try out some more baby-centric duds for the room. Crib, bookshelf, and daybed.

Step 2: Convince my husband to do more painting than anyone would ever want to do in their whole life. Start the painting spree by painting over the headboard on the wall. Get a dresser/ changing table and refinish it.


Step 3: Get some more furniture. Start the decorating: Wire display for pictures.


Step 4a: Put up the book slings.


We  made it 3 whole steps before I divided one up. Yes, I'm very sorry. I had to add a part a and part b to Step 4. It was getting a bit long. So, now you get to enjoy it in 2 parts.

Step 4b: More decorating: Floating shelves.

Step 5: Decorations, Part 3: Hang art above the crib and all around the room

Step 6: Refinish side table and get an ottoman


Step 7: Paint the chalkboard and mirror and hang them.


Step 8: Put up the curtains. Line the inside of the dresser with some of my extra fabric


Step 9: Finishing touches.


Here are some photos of the rest of the nursery!


Monday, April 15, 2013

The Nursery Chronicles: Steps 6: Refinish Side Table, Add Ottoman

The Nursery Chronicles are coming on strong. You got one last week, one is in your face right now, and you can expect another one later this week. 

In Step 6 I will show you the side table that we refinished. But that is not all... you also get to see an ottoman come to town!

Side table:
You have seen the side table live in the bonus room au natrule. But, as you may have realized by now, I love to add a little paint to things.

My lovely lovely husband did a bit of sanding and then adding a couple coats of white paint to the top and sides of it.

Here is how it turned out:

Here is a less blurry, less cluttered photo:

Ottoman:
We also added a ottoman because I had heard it is important to have something to put your legs up on while you are nursing. It turns out that I hardly used the ottoman until I discovered that I had a bunch of unused storage space.  (<-- ps check out this link if you want to see some cute photos of a really happy Cora in a bucket!)

Actually, that is not completely true about the ottoman not getting any use... for some reason my mom and I decided that it would be a normal (and totally safe) place to take photos of a 3 day old baby.
It should definitely be noted that there were hands just outside of the camera's view waiting to catch a baby on the move.

So, here it is: a green ottoman that I believe was purchased at Target for about $20.


The Chronicles of my baby's abode are almost complete! Only 4 more steps to go! 

Step 1: Get rid of the old furniture and try out some more baby-centric duds for the room. Crib, bookshelf, and daybed.

Step 2: Convince my husband to do more painting than anyone would ever want to do in their whole life. Start the painting spree by painting over the headboard on the wall. Get a dresser/ changing table and refinish it.


Step 3: Get some more furniture. Start the decorating: Wire display for pictures.


Step 4a: Put up the book slings.


We  made it 3 whole steps before I divided one up. Yes, I'm very sorry. I had to add a part a and part b to Step 4. It was getting a bit long. So, now you get to enjoy it in 2 parts.

Step 4b: More decorating: Floating shelves.

Step 5: Decorations, Part 3: Hang art above the crib and all around the room

Step 6: Refinish side table and get an ottoman


Step 7: Paint the chalkboard and mirror and hang them.


Step 8: Put up the curtains. Line the inside of the dresser with some of my extra fabric


Step 9: Finishing touches.


Here are some photos of the rest of the nursery!


Friday, March 15, 2013

The Nursery Chronicles: Step 4a: Book Slings

Welcome back to the 4th fabulous edition of The Nursery Chronicles! Today, is a fun one. I think so, anyway! We are going to be talking books and how to hold them. 

Let's get this party started with a look at the awesome book sling that inspired me.

Anyone who has read this blog more than a few times ought to know that I am a major lover of kid's books. So, when I saw this awesome book hanging fantasticness I knew that Cora had to have it in her room. I followed the tutorial that Megan posted on her blog, Penny Carnival, which is also where I got the image above from.

My little how-to is not nearly as complete as hers, so if you want to make these yourself please follow her instructions.

Step 1: Buy your supplies: double curtain rod brackets, wooden dowels, and fabric. 
Put up the hardware. We mounted the brackets with anchors rather than in studs because I wanted the slings in a specific location and there didn't happen to be any studs there.

Step 2: Cut and iron your fabric. We used no-sew tape because I am the worst sewer in the history of the world.

Step 3: Push your dowels though the holes in your fabric slings and then put those fancy things on the brackets.

Step 4: Admire your work! 

Did anyone happen to notice that I only wrote steps about the photos I had and skipped some of the important parts? Lucky for you I gave you a link to someone who did a much better job explaining it. Don't forget to read Penny Carnival for better instructions!

Here's the finished product! 

And, a couple more:


We have made it through 4 whole steps in this baby abode. 6 steps until the grand finale! 

Step 1: Get rid of the old furniture and try out some more baby-centric duds for the room. Crib, bookshelf, and daybed.

Step 2: Convince my husband to do more painting than anyone would ever want to do in their whole life. Start the painting spree by painting over the headboard on the wall. Get a dresser/ changing table and refinish it.


Step 3: Get some more furniture. Start the decorating: Wire display for pictures.


Step 4a: Put up the book slings.


We  made it 3 whole steps before I divided one up. Yes, I'm very sorry. I had to add a part a and part b to Step 4. It was getting a bit long. So, now you get to enjoy it in 2 parts.

Step 4b: More decorating: Floating shelves.

Step 5: Decorations, Part 3: Hang art above the crib and all around the room

Step 6: Refinish side table and get a few more pieces of furniture


Step 7: Paint the chalkboard and mirror and hang them.


Step 8: Put up the curtains. Line the inside of the dresser with some of my extra fabric


Step 9: Paint the mailbox/ stuffed animal house. Finishing touches.


Here are some photos of the rest of the nursery!


Do you need a little more Chronicle in your life? Check out The Living Room Chronicles, The Bonus Room Chronicles, and The Master Bedroom Chronicles!

Thursday, February 7, 2013

13 Lovely Gender Neutral Baby Abodes!

Happy Thursday! Let's start today off with a bright and sunny photo! Scott and I didn't know if Cora was going to be a girl or a boy so we went with a yellow, grey and green nursery although I probably would have chosen those colors either way. Let's take a look at how other parents have interpreted the gender neutral thing.

I love this sun clock and clouds! And, who doesn't want an enormous crab and a monsterous dog book on their dresser?

I am a big fan of green cribs (check out Cora's lovely green one below), but those curtains are what's getting me in this photo. And, I'm not sure you can see it but there is an awesome framed pictured of Mr. Potato Head too!


Here's Cora's green machine.

Fantastic arbor-age!  I'm inspired to turn this guy into a painting with some scrapbook paper or neat fabric. I am also loving the funky retro rocking chair.

Banner is my middle name and this is a pretty one! I also thought that thing in the corner was a home-made basketball hoop for a second. That would be a neat idea- to make a pretty one yourself  that fits the theme of the room. Fun and functional! 
The enormous mushrooms are not my favorite unless there Papa Smurf and his gang are living inside them.
Lastly, twine chandelier... yes, please!

Dog silhouettes, striped ceiling and a beautiful chandelier. This one is fancy! 

This fella is a bit different than what I would usually like. So, that's why I included it. Well, that and the super cool yellow dachshund under the crib and gator on the wall.

Wallpaper, ottomans, chair! Yes! 

Funky, everything! I like!

This yellow and grey nursery paradise has matching curtains to Cora's yellow and grey nursery paradise (see photo below). I'm always diggin' on some chevron! And, a practically life-sized giraffe never hurt anyone.

The curtains above don't have a fabulous monkey-head-hat attached to theirs like Cora's curtains do.

Lovely letters! I read somewhere about an idea for a baby shower where everyone brings a letter that they decorate themselves or a random object that looks like the letter. The idea is to have a cool art piece like the one below!

FISH!!!! 

I love these curtains and they look very DIY-able! 

A whole wall of books and a lovely ceiling. This bad boy may just have to be copied! 

No, I'm not pregnant. I am just here to appreciate some beautiful gender neutral nurseries.

sources: love those curtains, fish!, twin curtains, cool wallpaper, animal cool, letters, mushrooms, sunshine, funky, mr. potato-head, tree, book wall, yellow and white ceiling