Showing posts with label before and after. Show all posts

Monday, April 15, 2013

The Nursery Chronicles: Steps 6: Refinish Side Table, Add Ottoman

The Nursery Chronicles are coming on strong. You got one last week, one is in your face right now, and you can expect another one later this week. 

In Step 6 I will show you the side table that we refinished. But that is not all... you also get to see an ottoman come to town!

Side table:
You have seen the side table live in the bonus room au natrule. But, as you may have realized by now, I love to add a little paint to things.

My lovely lovely husband did a bit of sanding and then adding a couple coats of white paint to the top and sides of it.

Here is how it turned out:
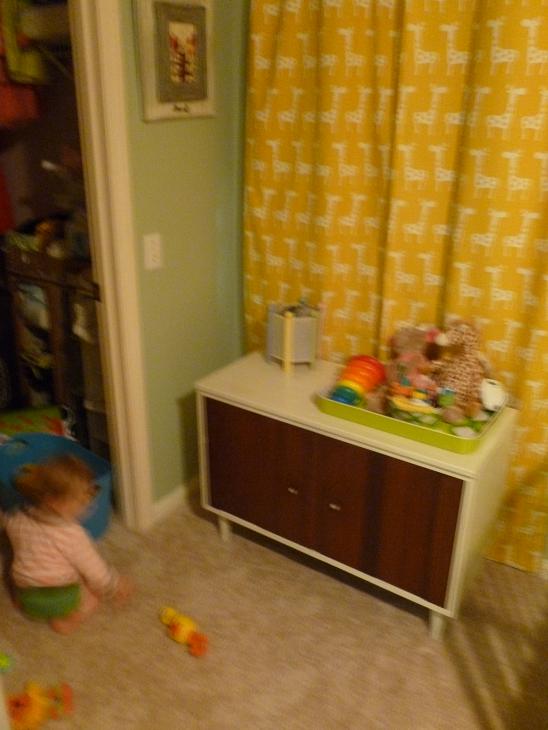
Here is a less blurry, less cluttered photo:

Ottoman:
We also added a ottoman because I had heard it is important to have something to put your legs up on while you are nursing. It turns out that I hardly used the ottoman until I discovered that I had a bunch of unused storage space.  (<-- ps check out this link if you want to see some cute photos of a really happy Cora in a bucket!)

Actually, that is not completely true about the ottoman not getting any use... for some reason my mom and I decided that it would be a normal (and totally safe) place to take photos of a 3 day old baby.
It should definitely be noted that there were hands just outside of the camera's view waiting to catch a baby on the move.

So, here it is: a green ottoman that I believe was purchased at Target for about $20.


The Chronicles of my baby's abode are almost complete! Only 4 more steps to go! 

Step 1: Get rid of the old furniture and try out some more baby-centric duds for the room. Crib, bookshelf, and daybed.

Step 2: Convince my husband to do more painting than anyone would ever want to do in their whole life. Start the painting spree by painting over the headboard on the wall. Get a dresser/ changing table and refinish it.


Step 3: Get some more furniture. Start the decorating: Wire display for pictures.


Step 4a: Put up the book slings.


We  made it 3 whole steps before I divided one up. Yes, I'm very sorry. I had to add a part a and part b to Step 4. It was getting a bit long. So, now you get to enjoy it in 2 parts.

Step 4b: More decorating: Floating shelves.

Step 5: Decorations, Part 3: Hang art above the crib and all around the room

Step 6: Refinish side table and get an ottoman


Step 7: Paint the chalkboard and mirror and hang them.


Step 8: Put up the curtains. Line the inside of the dresser with some of my extra fabric


Step 9: Finishing touches.


Here are some photos of the rest of the nursery!


Friday, February 22, 2013

The Living Room Chronicles:Step 3: New Coffee Table

Heyyyyy you crazy people! I knew you couldn't stay away from the world of coffee tables and pallets!

If you remember correctly, 2 living room posts ago, I showed you the best Craigslist deal this side of the Mississippi River! After my new sofa showed up I knew I was in need of a new coffee table.  The only ones that I could find to fit the space were black or white and I really wanted a wooden coffee table. I tried to think of ways I could make a coffee table myself, but you can't really use a coffee table made out of cardboard and I couldn't figure out a way to make one out of old kitchen cabinets. So, I turned to the most logical thing I could think of... shipping pallets. They were almost exactly the same width I wanted. 

So, I went on Craigslist and sure enough someone was selling them. He also happened to be selling them not far from my favorite fabric store (Mary Jo's) and right around the corner from the only drive in movie theater near Charlotte. Did you put together what happened next? I talked Scott into turning the pallet party into a fun trip.

When we went to pick up the pallets I went a little overboard and bought as many as would fit in the car. The wood was pretty unique looking to me and I figured I could use them for all sorts of weird projects. We stopped and picked up some lovely fabric and then headed to the drive in movies in totally packed car that smelled like a lumber yard. 


When we got there we realized that we could not recline our seats even the slightest. Who wants to watch a double feature sitting as straight backed as you possibly can. So, with all of our new drive-in neighbors watching and secretly judging us we unloaded pallets until we could recline a little.  Then we had to prop a pallet against the back door so the trunk wouldn't be up the whole time (that would have been against drive in rules). The whole thing was pretty awesome.

The next day I started playing around with how I was going to put this beautiful table together.  

I was trying to keep it simple. But he said he would help me turn it into a legitimate table. I gave him a drawing of what I was hoping for and sent him home with some pallets. 


Apparently the wood was really dry and the nails that were used to keep the pallets together were rim shank nails (not good if you are trying to get them out and keep the wood in good condition). Because of this he ended up using most of my pallets just to get the necessary wood out of them. It turns out that my simple plan changed about 100 times and required him to completely take apart the pallets and rebuild them. It would have made a lot more sense just to buy new wood. I bought a cedar mail post to use for the legs. My awesome handy man spent many frustrating hours and finally returned with my very unique new coffee table!


I sanded it, stained it and polyurathaned it and put it in the living room.  It was perfect.  It was better than what I had envisioned!


Now, you can check out that pretty pallet paradise in its new home:


The 7 Steps That Made My Living Room:


Step 1: Move in. Put in whatever furniture we had. Hang art.


Step 2: The Craigslist deal of a lifetime


Step 3: New coffee table (Step 3 Introduction found here)


Step 4: DIY remote control holder. A tiny, tiny step, but we are still calling it one.


Step 5: Should we change out the fireplace?


Step 6: The plant table and the plants


Step 7: Finishing touches

Monday, February 18, 2013

The Master Bedroom Chronicles: Step 7: Make Some Wedding-Related Art

Last week, we jumped back into the Master Bedroom Chronicles with headboard-making in process.

Waaaahoooo! I know it didn't take all that much work to put a rug behind the bed, but man oh man was I excited to get that crossed off my list. 

With the headboard started I was on a roll to make the master bedroom better looking. I set my sights on some lovely art to go above the bed. At all times, I have at least 1,000 options of things I could hang up in the house. So, I consulted my stash of the goods and a few lists of other wall hanging ideas. And, I landed on wedding related art. Vague enough for you?

Scott and I got married almost 5 years ago and people do not lie when they say that time flies!

In the wedding invitations, I included a hand drawn map.  A friend of mine was nice enough to draw a picture of each location that needed to be included on the map (the hotel, the reception site, and the ceremony site).  He did an unbelievable job and I have always wanted to do something with his drawings.  
I scanned them into the computer and played with them a bit in Photoshop.  In the end, I used just one of the drawings (the ceremony site).  I colored three prints differently to bring in some of the colors in my bedroom.  I used yellow, blue, and brown.  


I bought a few different pieces of fabric that went with the color scheme in my room.  I put mats in the frames and I figured out which fabric looked best with which print.  The fabric got introduced to the ironing board so I could be sure it was looking its best. 
Mom, I know you're going to comment that I need a new iron and ironing board. 


It seemed like something was missing. Construction paper to the rescue! I made  little border of construction paper matting around each piece print. Then I glued the print onto construction paper so it would stand out a little more. Yep, construction paper was the first thing I thought of to use and I had plenty on hand because I am a 3rd grader. 

It turned out to be a little tricky to get the construction-papered prints to stay on the fabric.  So, I cut a hole in the center of the fabric (making sure I did it in a place where it wouldn't be seen).  I put a piece of paper behind the fabric and glued that piece of paper to the back of the construction paper. I am 100% positive there was an easier way to do this, but that was what I came up with.


I measured and hung them. It is never perfect on the first try so there may be an extra hole or two behind the paintings.


We are just a few steps away from crossing a Chronicle off our list!

Here are the steps from the whole process:

Step 1: Move in. Throw a bunch of random stuff into the room and live with it for a while to figure out how we wanted to use the space.

Step 2: Rearrange the furniture and add a seating area.


Step 3: Redo a desk with a funky chevron pattern.


Step 4
: Redo an old chair for the desk.

Step 5: New comforter and lamps.


Step 6: Headboard, Part 1


Step 7: Make some wedding related art.


Step 8: New entertainment center.


Step 9: Add some new art


Step 10: Headboard, Part 2. Finishing touches. Try to bring it all together.


Friday, February 15, 2013

The Master Bedroom Chronicles: Step 6: DIYing A Headboard, Part 1


Welcome Back, Master Bedroom Chronicles! We haven't seen your yellow, gray, cream, and teal face since October. Sheesh! 

It is time to put on your construction hat and check out a DIYed headboard!

Did you happen to notice that this is only part 1 of this chronicle chapter? Part 1 gets the effect I was looking for and was apparently good enough to reside above our bed-heads for over a year before part 2 found its time to shine.

I've had "make a headboard" on my house list for at least 5 years. I didn't know what I wanted the headboard to be, but I knew it needed to happen. And, finally, it did. It started from my love of reusing things. I had a brand new bamboo rug that my father in law had given me from his storage unit (this is also where I acquired the floral turned skeleton turned chevron desk). Who knows what other magical things are in this storage unit!

The rug resided in our garage for a while until one day, I spotted it among plenty of other sad objects that were just aching to show off their beauty. The rug was trying desperately to make its way into our house. So, I put my brain to work. Obviously, the first thing that came to mind was to make it a headboard.  So, I pulled it out and apparently my father in law's magical storage unit has some water problems because there was a bit of mold on one end of it.  No problem... I bleached it like crazy and got rid of it.  Then I took out my fancy sander and sanded the bamboo down to a more natural color.  


Next, I threw it behind my bed.  Done! Well, as far as part 1 is concerned I am done. In part 2, I will trim the headboard to make it look a bit more finished. (PS you can see the finished product of part 2 in the after photos at the end of this post).

Shall we take a look at some headboard befores? Here I tried to reuse some other items hanging out in the "please use us pile." In case it isn't blatantly obvious, those are twig table runners wearing the disguise of headboard.


Next up, a painting tries its best to make you forget that there is a headboard missing, but it clashed too hard to work.

New lamps and a comforter helped, but the bed was still calling for a real headboard (or at least a random rug stuck behind the bed). 

Now, the moment you have all been waiting for... the bamboo headboard rug reveal!

There you have it! We are over halfway through with The Master Bedroom Chronicles! Below are all of the steps that got us here and the four remaining steps. Be sure to check out the final after shots too!

Step 1: Move in. Throw a bunch of random stuff into the room and live with it for a while to figure out how we wanted to use the space.

Step 2: Rearrange the furniture and add a seating area.


Step 3: Redo a desk with a funky chevron pattern.


Step 4
: Redo an old chair for the desk.

Step 5: New comforter and lamps.


Step 6: Headboard, Part 1


Step 7: Make some wedding related art.


Step 8: New entertainment center.


Step 9: Add some new art


Step 10: Headboard, Part 2. Finishing touches. Try to bring it all together.


Do you want more chronicles? Are you ready for the next chapter of The Master Bedroom Chronicles? I am sorry to tell you that it's not here yet. But go ahead and catch up on the rest of your stories: The Nursery Chronicles, The Bonus Room Chronicles, and The Living Room Chronicles.

Thursday, January 31, 2013

OO: Tips & Tricks: The Garage, Part 2

Organization Overhaul (OO) Garage Edition, Part 2 is in the hizzie. Last time we checked it out it had gone from this before photo to this slightly less terrible after photo.

Oh my goodness I cannot believe I am sharing that insanely insanely disorganized mess on the world wide web. President Obama, overt your eyes.


This garage was not going to get organized in one big clean. It will take at least 2 more big chunks of time to tame this fella. Every self respecting organizer knows that things have to get a little messier before they get clean. 


Since you last saw the garage it took a turn for the worst. I started pulling everything out and it stayed this way for a couple of weeks. A deck cleaner jar leaked all over the place and someone (most likely me) stomped it all over the house and there was quite a bit of mopping to get that situation under control. But don't you worry folks, I now have a handle on the situation.


Here's Messy Bessy (I just named my garage Bessy, stay with me) after I started yet another sorting process. And a photo of her lookin' a little better.


ehhhhh is anyone impressed? Anyone?
I know I didn't work any magic on Messy Bessy, but I gave it a decent shot. And, it was raining... hard! No one wants to be in a humid garage with freshly washed and straightened hair!

Check out that rain!

Pretty!

The main thing that I accomplished was moving large chunks of the murphy bed (yes, this one) out of the garage and under my bed. 

It used to exist here, below the painting of an old-timey cat in a suit and in the back of the garage.

It now lives here. Ohh hello... is that a murphy bed sticking out the end of your bed? Darn! Yes, it is! I measured the doors and they fit perfectly under the bed. But, the darn sides are taller and I forgot to take that into consideration.


To make sure you all stay tuned through this fascinated tiny step by tiny step garage clean out process I am also going to include some cool organization ideas for the garage.


garage- screw the lid of plastic containers to the bottom of a shelf


Let's get this party started with a little Tool Organization:


This idea is basically the epitome of garage awesomeness. I like to think that this idea is the reason I have saved every single jar that has ever come into my possession. In case you were wondering, jars come into my possession on a very regular basis. I clean them and hoard them. Then, one day, Scott will open a closet door and 5,321 jars will explode out and knock him down (kind of like the Dick Van Dyke walnut episode- photo below). Scott then tells me that I really need to get a grip on my jar collection. So, I say goodbye to about 6 of my least impressive jars and then we start the whole process over. I have big plans for those jars... BIG BIG PLANS!

Back to the photo... the idea of tracing the tools at the spot where the belong is also pretty awesome.
via
Now, a photo of the Dick Van Dyke walnut episode mentioned above.
via
A magnetic bar for your tools- clever!!
via
You don't have magnets, but you do have a little extra PVC pipe floating around? Well, screw that sucka into a piece of plywood and keep your tall boys in it.
via
One more photo of the glass jar action. And, just in case you were hoping I would talk a bit more about my jar collection I would like to reiterate that I have been saving both glass and plastic jars. I am not convinced that it is a good idea to literally have glass jars just floating all over the place especially when you are a big spaz like me.

Are you telling me that you really weren't into the magnet idea I showed you above? OK I present to you the idea of hooking your tools onto nails. That is probably the whole reason that all tools have that hole, but I am just putting this together.
via

I am a big lover of chalkboard paint. You don't need to waste your time opening the drawer to check what's in there. Just write it on and never question it again.
via

I cannot be the only one in the world who is always on the look-out for a good spot for my lose lumber? It is wood scrap galore in my garage and I never know the best way to store them. This one does a pretty good job.

I know how this works... I've got to leave you wanting more. So, don't you think for a second that I am going to give away anymore garage organization idea. You will just have to wait until I get the courage to tackle part 3 of my own garage. Until then, Happy Thursday! Who is ready for the weekend?!?