Monday, February 24, 2014

The Magnet Board's Friend, Chalky Boarderson Comes To Town

The time has come to take a little peak a boo at where the chalkboard message center from our old house ended up at our new house.

We had a yellow chalkboard in Cora's room at our old house but it didn't quite fit into her new room.


 I finally found a home for it near her cubby hole and magnet board.

Here is the soon-to-be new home for the chalkboard:

And here is the chalkboard in place:
Bam. It was just that easy!

This is the Luns message center from Ikea. It comes in a neutral wood color. Scott had painted it yellow for Cora's old room and luckily, it worked perfectly in the space. Looking at these photos makes me realize how excited I will be when we finally get around to painting our house.

I used the hangers that they provided to hang the chalkboard but I added a screw into the stud for added stability. You can see the screw down toward the lower right-hand corner.

We use the letters from the magnet board for this chalkboard too. Cora got a bunch of foam magnets from Santa this past Christmas that have random objects on them. Sometimes I will put one of the magnets on the chalkboard and ask Cora to find the letter that the object starts with. She likes that game OK but what she really likes to do with the magnets is get the queen, the x-ray man, and the doll and pretend that they are a family. Then she gets the blanket and tucks them in for naps and bedtime. She feeds them the food from the magnets and gives me showers and baths even though there are no magnets for that.

Cora's other favorite thing to do with her magnets is to get the lower case "I" and "J" and pretend they are ice cream cones. Somehow the combination of lowercase "H" and "L" is also an ice cream cone.

That little lady has an imagination like no other. We don't need even need any toys. I think she would rather pretend things are here than them actually be here.

And now you know the exciting history of the magnet board and her friend, Chalky Boarderson. I will try to keep things a bit more mind-blowing for you in the future.

Monday, February 17, 2014

Nursery In A Closet Gets A Tenant!

I introduced you to the newest resident of 123 Nursery In A Closet Ave. recently... Sir August Connor Spencer.

Today, we are going MTV Cribs up in here. August himself wants to show you around his new digs.

He has requested that, before we show it to you, we tidy it up a bit from every day living. So I will first show it looking spiffy.
FYI picking out which photos to use with August in them might be one of the hardest things I've ever done. I love that little bitty bundle and I think he looks super adorable in all of them!
ps please ignore the gross stuff on the front of his crib... I pulled the information sticker off of our crib and it left some funky residue. I need to do a little Goo Gone action to it but haven't had time to look for a less potent alternative.

Here's another shot of the fabric wall and the fish mobile.

Here are the little clothes and toy hangers I made: 

You may not be able to tell but August is showing off some cool dance moves below.

He is especially fond of the super organized basket situation above his crib.

Ahhh I love organized baskets! 

One more: 

Yeah, I'm just chillin' in my pad.

I often find August staring up at the art work reading about seals and walruses and thinking about what a great artist his sister is.


As I have already let on, August's abode does not always look so spiffy. Next, let's take a look at it in the everyday world:
I had to make a couple of changes in order for his shack to be ready to get Cribbed-Out. First, I had to get the lobster picture that Cora made and the dolphin picture to stay up. I had initially used tape but the pictures were constantly falling through. I fixed it by stabbing some little holes through the pictures and the cardboard-covered fabric. Then I put some of my old earring studs in and fastened them in the back. Tada! The pictures now stay put!

Next, I had to remove all of the toys and stuffed animals that Cora brings into his crib on an hourly basis. Cora loves to assign people dolls. Scott is the princess, Tiana. I am Cinderella, amongst a million other animals, dolls, fingers (I usually get to be her thumb), etc. Cora's favorite thing to do is find a group of items and assign them all as mom, dad, Cora, August, Kelly, Gram, Grandad, Suzan, Pop, Bu, Wren, Uncle Rick, and Aunt Jennifer. If you have recently visited you usually make the list for a while. Then she makes sure that she calls you by one of the names that she has assigned you. For example, I have been called nothing other than Rosita (a Sesame Street character) for the last month. Slip ups are surprisingly rare. August is Elmo, Princess Belle, a pig and a few others. So those dolls are often found on his crib.


Lots of junk underneath the crib, the basket of too big clothes is overflowing, his crib is full of toys that Cora thinks he needs.

In this photo you can kind of see the Belle doll that Cora slipped into August's crib. There is also a random bunny that she thought he might like.

Ahhh look at that sweet little sleeper!

That concludes another edition of Cribs. Sorry August doesn't have any fancy cars or bling to show off yet!

You may ask the question, "Why did we put our baby in a closet?" Well, my friend, that is a good question. And, I answered it in detail in this post: Nobody Puts Baby In The Corner (A Look Into Our Strange Nursery Situation)

If you want to know more details about how August got such a fancy-looking closet check out the links below.
Step 1: Fabric Goes Up
Step: Fancy Dancy Art And A Crib
Step 3: Up With The Shelves
Step 4: Get Yourself Some Decorations

Monday, February 10, 2014

The Magnet Board Comes To Town, Part 2

Last Monday you got to check out how we made our new fancy dancy magnet board with the help of my parents! Now it's time to show it off a bit more and tell you about how we use it.


In case you forgot what that little door in the middle leads to it is Cora's cubby hole.

After my dad put in lots of hard work building the magnet board he wanted to do the fun stuff and spell out some words on the board for Cora.

We surprised Cora with the magnet board after she returned home from preschool. She loved it and immediately started giving out letters. In this photo she is insisting that cameraman dad take the letter D.

Usually, the magnet board has capital letters and lowercase letters on it.

You can often find a totally naked doll floating around our house. Dressing and undressing dolls and giving them pretend showers and baths is one of her favorite things ever.

Sometimes we bust out the Eric Carle flash cards and match the letters up to the animals.

The other way we use this board is by playing the "Chasing Letter Game." It is one of Cora's favorites and I like it because she gets exercise while she learns her letters. We have all of the capital letters down now but the lowercase ones are tricky. 

The complex game goes like this: I say, "Go find the letter G [or whatever letter I choose]" and Cora races to get it as I run after her screaming, "I'm gonna get you." Then she runs a lap or two around the kitchen and hallway and we play again. Tada! I may contact the Olympic committee to see if they are interested in it for the summer Olympics.

Yay for magnets! Yay for fun!

Monday, February 3, 2014

The Magnet Board Comes To Town, Part 1

Oooooohhhh Look At This Fanciness!

It is a distant memory now but there was a time when I could find hours throughout the week to blog, put up magnet boards, watch TV, shower when I wanted to, etc. These days we are happy if we can keep both kids fed.
I had dreams of putting a magnet board up in our main living level before August was born. I thought it would be another fun solo activity for Cora to keep herself occupied while I nursed August.
So I went to the Google machine and found out that people love to use oil drip pans as magnet boards. I liked the idea because it looked super easy. I searched for oil drip pans and they are hard to come by locally.

Amazon had a few options but the reviewers said that the pans often came dented. I nixed the oil pan and decided to look for something that looked a bit more finished.

I went out on my own. I decided that I would just find a sheet of metal and frame it with some wood.
I bought this metal sheet from Lowes. Online it says it costs $9.34 but I'm pretty sure I paid close to $20 in the store.

I bought some wood to trim the sheet out and had them cut the pieces to size for me at Lowes.
I also bought some self tapping screws and some corner braces for extra stability.

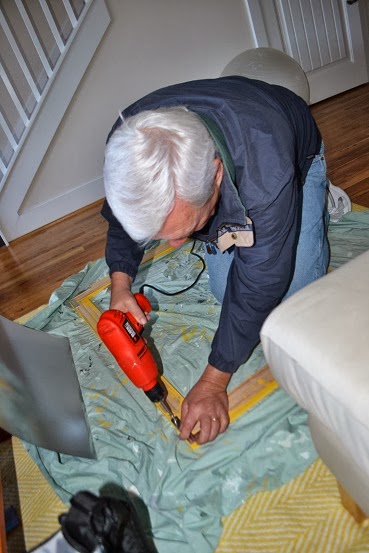
My mom was in town waiting for her grandson to arrive and she kindly offered to paint the wood for me. Here she is ready to roll:


And here she is working happily:
That's right... these photos are pretty much the same but she is such a nice mama that I decided to show you both.

If you take on this project make sure that you clean the metal sheet really well. Every time you touched ours you would get totally oiled up. 

Those lovely yellow boards stayed painted and ready to roll for a couple of weeks. I don't think I mentioned that I took on this project the day before I was induced to have August. At about 9pm both Scott and my mom told me to call it quits on the magnet board. So I did. They were right. I was glad to have a nice night of sleep before the start of a new episode in my life called, "You have a wonderful family but nowhere in the foreseeable future will you sleep more than 4 hours a night."

My dad came to town a day or 2 after August was born and that is when phase 2 of build-a-magnet-board happened. The day after we were home from the hospital it seemed like having two kids might be a piece of cake. August slept a lot during the day and we had plenty of family in town to entertain Cora. It was so easy that one day, while Cora was at preschool, I decided I would try to finish the magnet board. I got it all ready to roll and then August demanded some food. My dad kindly offered to finish the job. Thank goodness he did because my plans were different than his and my magnet board would have resulted in a flopsy wopsy (that is what Cora has named all of her stuffed animal bunnies) magnet fest. 

He put the corner braces on:

Then he put the metal in place and started up those self-tapping screws. This is the part where our methods differed... I would have just put a few screws in but my dad used almost all of them and it made a huge difference. If we had just put the screws every 6 or so inches (my method) the board would have been very bendy but with the extra stability of having the screws spaced about an inch and a half apart the board was feeling mega-sturdy.
He also had pretty impressive old man strength (dad, I just said that to teach you a lesson for calling Kelly and I middle aged!!!)

I will tell you about how we hung the magnet board next week.

My parents are pretty awesome, aren't they?! I can't wait to show you more photos of the finished product and tell you all the fun ways we use it. Tune in next week! Thanks again, mom and dad!

Thursday, January 30, 2014

Will This Post Be Another 1/15 Of The Way Done Nursery Post?

Nope! This post is an apology for the last two posts that have mistakenly gone up. I ran out of completed pre-written blog posts and the unfinished ones started going up before I noticed. Sorry about that! 
There will be a legit post on Monday.

How about a couple of very random photos to tide you over? ps If you are not a member of my immediate family or one of my closest friends these photos will not tide you over at all.


We had snow in Davidson 2 days ago! We built the lamest snowman you've ever seen and made some pretty fancy snow angels!

August dressed up like a man. So cute and so funny! 

Australia Day was a few days ago. We celebrated by digging up some of my old Aussie t-shirts from I was little and doing a photoshoot of Cora and August in them. Cora's says "Aussie Champ" and August's says "I'm a Vegemite Kid." 

This little cutie insists that all sunglasses be put on up-side-down. If you try them the other way she thinks you're being crazy. 

Auggie in a fat man suit. Yes, below is a photo of my son looking like the Stay Puft Marshmallow Man from Ghostbusters. I did not dress him up like this because I thought it would look hilarious (although I do think it looks hilarious). He is sleeping in something called Baby Merlin's Magic Sleepsuit. It is supposed to be a life-changing sleepsuit that magically gets your baby to sleep by [insert funny comment here... I'm too tired to think of one myself]. The verdict is still out. His first night in it was far from magical. Night 2 was pretty decent. If it ends up being as amazing as it is supposed to be I will certainly let you all know.

I hope to see you back on Monday!

Monday, January 20, 2014

Big Girl Room Updates: Curtains, Organization & Some Art!

I was wayyyy late in doing it but a couple of months ago I finally gave you an introduction to Cora's room. Progress has been made since then so I am here to show it off!

The to do list for her room:
  • Reassemble all furniture
  • Hang art above day bed
  • Hang floating shelves above dresser
  • Hang blinds
  • Hang curtains
  • Hang more art in her room
  • Paint
  • Maybe paint the back of her tall Ikea Billy bookcase a fun color
  • Touch up all furniture (the move was hard on it)
  • Organize the bookshelves
Now it is photo time!

You have seen my mother-in-law's handy sewing work a few times. Here is another example of it... look at those beautiful curtains! I had just asked her to add about a foot of extra fabric to the bottom of Cora's old curtains. But she decided that she wanted to fancy them up even more. She changed out the old lining to black out lining (I guess she was sick of seeing our classy looking trash bags covering the blackout blinds we bought). It made a huge difference! Even though we have pull down blackout shades in Cora's room the sun still pours in like you wouldn't believe. There are 1/4" gaps around the window and that sunny sunny sunny sun sneaks on in. She also made the curtains wider. We used the Betydlig brackets and Racka curtain rods from Ikea again and are really happy with them.

Some of the art from Cora's old room went up above her daybed. The illustrations are from The Wild and Woolly Animal Book by Nita Jonas. And, I organized her bookcase a bit better.

A little more organization but still missing some decorations: 

The floating shelves above the dresser still haven't been installed. I think the room will really come together when I finally get around to that. 

Here are a few more views of the room: 


Who knows... the next update may be when Cora and her brother start sharing a room!

Monday, January 13, 2014

Dining Room Update: Curtain Time!

This is just a quick little dining room update for you. A few weeks ago I showed you the curtain magic that my mother-in-law made happen in the living room. Today, you get to see her sewing skills put to work in our dining room.

I picked out the Smaborre fabric from Ikea for the job.

The curtains were even delivered to me on hangers:


I am a big fan of Ikea's easy to use and easy to hang curtain rods and brackets: Betydlig brackets and Racka curtain rods. So far, they are the only curtain rods we have used in this house. I like how minimal they are. There are no fancy scepter-looking things attached to the ends. And, they are pretty darn inexpensive. I'm into it.

Up went the brackets:
Scott had to cut the middle Betydlig bracket with a hack saw so it would fit between the window trim and the molding.

I like the look of floor-length curtains much better than curtains that stop at the windowsill but it made a lot more sense to have them this length. Now, you can easily pull the curtains across the window without having the fabric get stuck behind the bench.

Ikea let me down big time with their Tupplur roller blinds. These things stink. They were very easy to install but they do not do their job. The won't stay in place at all. They just roll straight back up or they stop at a totally random spot. Definitely not what you want in a roller blind. We got them because we knew I would be doing a lot of nursing in the dining room and neighbors have a fantastic view of my nursing chair from the street outside.

It took me forever to get the 2 blinds even for this photo:

Normally, they look something like this:

I made the blinds work by putting a nail at the bottom of the window. 

Whenever I want to use the blinds I just pull them all the way down and hook them onto the nail.

I am really happy with the curtains! Yay for house progress!

ps who likes our dining room view? The close neighbor thing really hasn't been a big deal. We get tons of light in our house and none of our windows line up. So it never feels like you are face to face with your neighbor.