Monday, October 28, 2013

Nursery In A Closet Update #3: The Shelves Go Up And Get Decorated!

It is time to take another peak into my baby's nursery in a closet!

So far, we've:
Now, it is time to talk about some storage. We are going shelf city up in here!

Ikea sells some plain white brackets for 50 cents a piece. I have not been able to find anything that beats that. Considering the number of shelves I have put up in this house, inexpensive brackets are very important. I bought 6 Ikea Ekby Stodis brackets (aka the fiddy centers) and I hit up my local Lowes for some wood cutting help.

Tada! I was left with 3 shelves that fit perfectly in the baby's closet in a nursery. I have hung enough shelves that I ought to be able to do it blind-folded but something about the angle of the shelves, the tight-fitting crib, and my fairly massive belly made this task one of the most frustrating projects I have faced in a while. 
This photo shows a little piece of how annoyed I was:

After plenty of grumping around, lots of complaining, and a few attempts to give up completely I finally finished. Now, it was time to do one of my favorite things: decorate the shelves! So, I went basket shopping around the house and I came up with a few baskets that didn't quite make the cut for the living room storage (not yet pictured), a mini tower of drawers, and a piggy bank that my mom bought for the new baby. I'm counting the piggy bank as storage since it will be storing moo-lah. 

My mom, Cora, and I took a stroll through The Dollar Tree and all I ended up with were a couple of blue plastic bins (... and some Elmo soap, and a few sticker packs). 


A trip to Michaels & Target supplied me with the three perfect binss to finish off those pretty shelves:

I busted out the pretty paper, yarn, and a hole punch and added a tag to each bin mainly so I wouldn't have to try to explain to Scott where things were.
And, I made some Pretty Little Tags!

Step 1: I traced a circle 5 times on pretty paper and cut it out

Step 2: Hole punch city
Step 3: String yarn through the hole and attach with tape or through a hole in the basket
Step 4: Admire!

Here is what I ended up with:


More views?
You got it!


I love it! It really makes me happy!

Next week is the finishing touches: a cute fish mobile and some DIY hangers.

Monday, October 21, 2013

Nursery In A Closet Update #2: The Crib Goes In, The Art Goes Up!

A couple of weeks ago, I gave you a glimpse into my plans to put our baby's nursery in a closet. Last week, you saw the fabric go up on the wall.

Today, let's talk about the ridiculously tight-fitting crib and the wall of art. 


Here's the to-do list:

  • Paint the walls gray
  • Hang fish fabric
  • Frame fish fabric & touch up paint frame
  • Put in crib
  • Patch & paint crib-assembly-related holes (it is a TIZZZZIGHT squeeze)
  • Put up shelves
  • Put up mobile
  • Put up frames
  • Make the shelves beautiful and efficient!
I've got a little secret for you... I have finished the closet nursery completely! But I am going to break it down into a few posts because I don't want your brains to explode from too much excitement.

My mom and her husband, Emery, came down a couple of weeks ago for a visit. They were mainly in town to spend lots of time with Cora and give me time to get some things done around the house. They very generously pitched in on house-related to-dos as well. I talked Emery into helping me put the crib up in the closet that was the exact same width as the crib. Emery had his doubts that it was going to work.
The 3/4" or so of space you see on either side of the crib is the baseboard. The crib is snuggled up as good as it gets to that baseboard. FYI- that is not the mattress we are using. It is just randomly there until we put the right one in.


But it did! And it only took about an hour, a bit of sweat and a few marks on the wall. I had counting on having to gouge out chunks of the wall and patch them later in order to make the crib fit. But it turned out to be one of those rare DIY times when things end up being easier than you expected.

I didn't take any photos of the crib-putting-together process for Emery's sake. He was already nice enough to take up this tiny space with me for close to an hour with serious doubts that the project would come to fruition. I didn't want to drag it on any longer for him.

I also talked Emery into spray painting a few frames for me. 


We may be low on space in this house but we are certainly not short on things to hang on the wall. There are canvases and frames galore in this hizzie. I still haven't hung a lot of art at our house and that is partly because I have too much to choose from. I keep second guessing myself. 


So, for the baby nursery in a closet I went art shopping at home and came up with 3 canvases and 3 frames. I looked through my "potential hang up" folder and found a couple of prints. Then, I went shopping in my scrap fabric bin. I had plenty of options.

My mom and I helped Cora make some lobster art with a foot print and a couple of hand prints.

Why yes, I did draw a shirt onto my daughter. I decided to try to limit the number of topless photos of her on the internet even if it means drawing a sweet green muscle t-shirt on her. She was shirtless because this was quite a messy project.

I drew a few ocean-ish objects and tried them out to see which I liked the best. We decided that my octopus looked too creepy and went with a ship, a whale, and a few fish.

Next, I traced them onto some nice stock paper and cut them out.


My mom ironed some scrap fabric for me and I stapled the fabric to the canvases. I glued our ocean buddies onto the canvas and we were in business.


I pulled a few pages out of one of my favorite book of children's illustrations (The Wild and Woolly Animal Book by Nita Jonas) and hung them up too. I bought the book a few years ago for some art in Cora's old room:


Here is the finished product:


A little close-up action for you: 
The dolphin and duck picture is from an Eric Carle book.


Start getting excited because next week I am going to show you the shelves and the mobile!

Tuesday, October 15, 2013

Nursery In A Closet Update #1: The Fabric Goes Up

Last week, I showed you some of the things that would be going into our baby's nursery in a closet. Today, I am going to show you the progress we have made so far!

Here's the to-do list:
  • Paint the walls gray
  • Hang fish fabric
  • Frame fish fabric & touch up paint frame
  • Put in crib
  • Patch & paint crib-assembly-related holes (it is a TIZZZZIGHT squeeze)
  • Put up shelves
  • Put up mobile
  • Put up frames
  • Make the shelves beautiful and efficient!
First, I took down the old closet shelf, patched it up and taped everything off to get ready for Mr. Paint.


Walls turned gray! They were officially the first walls in our house to be painted.
We had a little issue with the paint... I didn't want to buy new paint because we have about 3,000 gallons of paint in our garage. I picked out one of the many shades of gray but there wasn't quite enough. So, Scott painted one and a half of the walls with that one and the other wall with a different gray. One is called Pewter Mug by Behr and the other is called Dolphin by Benjamin Moore. Pewter Mug is the one pictured above. Since time was precious and paint was almost out Scott didn't paint most of the area that would be covered by fabric. And, in about 6 months, it would be covered by clothes.

Then the fish fabric went up! The method I used was the official method of: lots of tiny nails.
First, I ironed it:

Cora got a special treat while all of this was going on. That little lady does not get to watch TV at all, but we decided that she might like to be entertained a bit by Goofy or Curious George while we did some quick hammering. So, Scott got it set up for her and watched a bit while I got the everything ready to go. I am pretty sure that he wanted to watch the cartoons more than she did. Actually, I am positive about that because after 5 minutes or so she gave up on that goofy dog and asked if she could go play in her room.

Before she left, she gave out some important DIY supplies: a crown and some of my old super-huge sunglasses from her toy box in our room.

For the trim that I was going to put up around the edges of the fabric, I drilled a hole about every 12-15" in the trim and hammered nails part-way through. And that is what you see the sunglasses queen doing in the photo above.


Next, I held the fabric on the wall where I wanted it and Scott nailed it in. He would put a nail in the left side while I held it tight and then a nail in the right side while I held it tight. I wasn't too precise about it but I did measure the left side each time to keep it about 12" from the wall since the shelves would be going there.

Then I just folded the extra fabric under and nailed it in. After the sides were in place, we nailed the top. I folded the bottom under and nailed it in so it had a nice clean look.


I had someone at Lowes cut my trim to exactly the right size for my fabric frame. It was already primed white and Scott just added another coat to it before it went up.

Then, up the trim pieces went. It was easy stuff.

Cora came and checked it out:

She approved but she is definitely going to be major jealous when she realizes that new baby gets to sleep in mom and dad's room. She would spend every second in our bed if she could.

A lot of progress was made on this little nursery in a closet over the weekend. So, I hope to be back soon with another update.

Tuesday, October 8, 2013

Living Room Update Number 3: Shelving That May Not Be For Everyone!

There is a space next to the couch that has been bugging me like crazy since we moved in. I just could not figure out what to do with it. I really wanted a reading nook/ wall of books there but the space just didn't really seem to be the right size for it. I am still trying to find a place to fit something like this beauty in:

I thought that a command center might be nice there. Maybe something like this:

But I just couldn't find the right furniture to fit there.

Recently, I came across this photo and fell in love:

Now please go ahead and lower your expectations tremendously for what I have coming your way.
Do you remember all of those shelving units we bought for the garage. Well, we are now up to numero cuatro steel shelving unit in our house.

I convinced my lovely lovely ridiculously busy with work husband to paint it for me and we were in business.


My mom came into town and she and Cora and I did what any mother dreams of doing with their grand-daughter... hitting up craft stores for a few hours to measure all potential baskets and bins and compare prices and coupons. In the end, I came home with about 3 times too much stuff. I just couldn't be sure how it was all going to look. Luckily, my mom is coming back into town next weekend and I know she will be thrilled to trace our steps back on the return circuit.

I tried out a few options and here is what I came up with:


The tops of the shelves didn't line up with the edges of each shelf so I came up with a solution... wood! 2x4s and 2x6s. I spent a long time in Lowes measuring and calculating to find the perfect fit and I finally did. There would be 2 2x4s and 2 2x6s per shelf. A nice Lowes employee helped me figure out which boards I should buy and what cuts needed to be made. I had officially over-mathed myself and was started to second guess even the most simple equations. Mr. Lowes cut all of the pieces for me too.
I returned home with a trunk that looked like this:

Shoving all of the newly-cut boards into place was strangely satisfying. I think I was just relieved that they all fit... perfectly too!
One shelf in place!


Scottio kindly painted the 2 wood crates white for me. 

The arrangement isn't permanent and surprisingly only one of those storage bins has something in it. Things will definitely be changing. The picture on top has not been hung yet and may not end up there. When it makes its way onto the wall I will show you a close-up of it. It is pretty neat!
Here is where we are now:


I can almost check this shelf off the list. The big check mark isn't here yet because I eventually want to stain the wood- probably the same color as the coffee table.

I am happy with the progress. I cannot wait to get some paint on those walls and curtains hung!

Monday, October 7, 2013

Nobody Puts Baby In The Corner (A Look Into Our Strange Nursery Situation)

I'm sure you remember that line from Dirty Dancing, "Nobody puts baby in the corner." Well, lucky for us our new baby will not be going in the corner. He will, however, be living it up in the closet. Ehhhhh let me explain before you start getting judgy on me.

Here is our weird little secret: the baby will have a home in one of our two master bedroom closets. As I have told you many times before we really downsized with this last move. We lost a bedroom, lots of square footage, and lots of storage space. So, the baby will stay in the master bedroom with Scott and I until he can sleep through the night. Then he gets to share a room with his big sister. We don't plan on this house being our forever home. When our kids are old enough that sharing a room with someone of the opposite sex might be weird we will reassess our living situation. Back to the point, yes... we are going to have a baby in the closet. It is a fairly big closet- not quite a walk-in but much deeper than a normal closet. I am going to dress it up and I hope to make it feel like a cozy little (teeny tiny) room. The doors to the closet will be open most of the time, maybe always. I know this is not a traditional sleeping arrangement but it is what will work for us and we are OK with that.

I am still going to dress the closet up like it is an actual nursery even though it will pretty much only fit the crib inside it.

I ordered enough of this fabric to cover the back wall of the closet nursery.


I bought this cute crocheted fish mobile off Etsy:


I have some shelves going up on one of the side walls and the other side wall will have a bunch of frames with random pictures... not sure exactly what yet. There might be some laura-made fish art or some fish illustrations from kids books.


There might even be a couple of Cora-made art going up! These days, I have quite the collection to pick from.

Scott painted the walls grey, but there will be lots of fun colors to make it more fun! I'm getting excited!

Tuesday, October 1, 2013

The Master Bedroom Gets A Master Makeover

Ughhhh go ahead and lower your expectations. The "master makeover" that I speak of is pretty much just setting it up exactly like it was at the old house. I was going to break these updates into two separate posts but let's get wild and combine it into one!

A couple of weeks ago I gave you the run-down on the progress the room had made so far, including a shot of it looking super organized on move-in day:

This is actually a pretty decent looking before photo compared to a lot of the other craziness that was happening in our house. After a couple of days of unpacking and organizing we were left with this:

I didn't give you a to-do list for this master bedroom because it seemed like there wasn't all that much to do. But everyone knows that you can make a to-do list out of anything. 
So, here it is:
  • put up blinds
  • put up headboard
  • hang art above bed
  • hang art between windows
  • hang art between door and bathroom
  • hang art between closet doors
  • paint
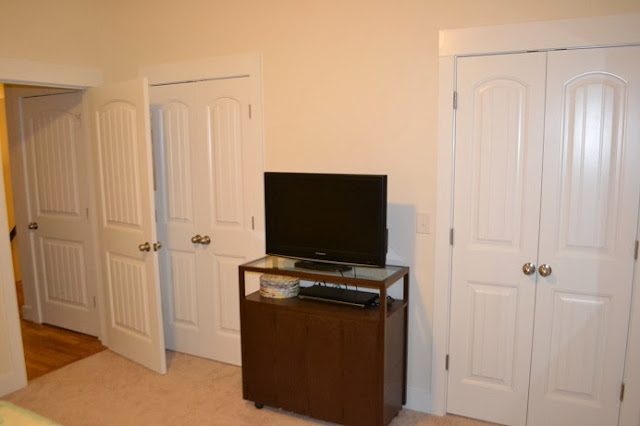
  • switch out TV stand for a dresser
  • put a clothes rack up on the back of the door
  • redo both closets
Wooooo! The to-do list is just running away. That thing is almost done! Let's take a look at the progress.

First the blinds went up. This happened within the first few days of moving in because the neighbors on either side of us are really really close. I will not include individual photos because we all know what blinds look like. We bought the Levalor custom-cut blinds from Lowes and have been happy with them. We haven't taken off all of the extra slats yet but I don't expect it to be a big deal. 

Then Scott and I had one incredibly productive night and got the master bedroom looking pretty good. The headboard went up:

Art went up above the headboard:
These pictures still need to be straightened out a bit but, by the time we had hung them, we both decided it was bedtime and we were happy just to have the pictures off the floor.

Some more art went up:
This frame used to hold some Van Gogh photos in our old master bedroom. I decided to upgrade the masterpiece with a little potato stamp art by Van Laura.

The baby will be in our room for a good while. Because of that I wanted to optimize our storage for him. So, I changed out the TV stand that I bought many years ago at Goodwill for about $7 (and am still very fond of).

  I switched it for a nice dresser from Ikea. The Hemnes 3 drawer, to be exact.

Next week, I am going to write a post about exactly how we are planning to fit a baby in the master bedroom.

I didn't get a chance to take a photo of the drying rack. So, I will share that exciting laundry-related photo with you in the next master bedroom update for you.