Showing posts with label current house. Show all posts

Monday, May 27, 2013

Happy Memorial Day!

Happy Memorial Day!

I hope those of you who have the day off have a fabulous one! I will spend the day packing, packing, packing, packing. One week from today we move everything out of our house. We are still going to spend the night in the house (camp-out style with no beds or anything) because it makes me sad to think that we could have spent an extra night in our sweet old house and we didn't.

It is all starting to hit me. We are about to leave the house that we lived in when we got married, when I had Cora, when she took her first steps, and said her first words. What makes this all even harder is that Cora is getting sad about things getting packed away or taken down from the walls. Every day, she points to where a picture of a llama hung on the wall and says "llama gone" in the saddest/ cutest voice you've ever heard. Then I say, "I know the llama is gone, but we will see him again." She starts nodding like she knows everything is going to be OK and says "Dav Dav" meaning we will see the llama again in Davidson. Then we repeat this process with the penguin, the duck, and the pig. Aha! As I am typing this I just figured out that she is talking about her piggy bank. I had been trying to convince her that there was no pig picture in her room.


And, now you know the three most important things in Cora's room. I didn't know they were favorites until they were gone.

We stopped by our new house to check out the progress for a quick second yesterday and Cora picked out where the llama, the penguin, the duck and the pig would go in her new house.

Here she is checking out the ceilings with Scott.

The good news for Cora about us taking everything off the wall is that the chalkboard in her room is temporarily at her height.

Here is one more Cora photo to celebrate Memorial Day (let it be known that this photo has nothing to do with Memorial Day). On the way up to see our new house, we saw a random dog in our neighborhood that looked like it didn't belong. So, I stopped and checked its tag. Sure enough, it was from a nearby neighborhood. The dog was SUPER DUPER friendly and Cora thought it was pretty fantastic that we got to hang out with the dog until his owner came.
ps this photo doesn't show off the dog's happy personality. I promise he was a sweetie.

The Memorial Day fun isn't over yet. I have a few shout outs:

Happy birthday to my BFF, Sandra Dee!!!!


Congratulations to my dad and my sister for finishing their walk on the Camino de Santiago. They went to Spain and walked about 200 miles in less than 3 weeks. You can follow the adventure on my dad's blog, Young Codger!
Here they are walking on the camino. They hit a bit of a snow storm, but for the most part they had pretty nice weather.

I hope to be back with a full post tomorrow!

Wednesday, May 15, 2013

The Nursery Chronicles: Step 8: Put Up The Curtains, Line The Dresser

I am trying my best to wrap up all of the chronicle series before we move out of this house. Right now, we are one down and three to go. 

I am sorry to tell you that this particular step is not the most exciting one, unless you consider giraffe fabric exciting. In which case, you are going to go BONKERS over this post!

The last time that The Nursery Chronicles graced your eyes, we were painting things yellow and hanging them on the wall. This time, we are hanging curtains and lining dressers.

Curtain Hanging:
I didn't take photos of the actual process so you just get the before and after. After many trial and error lessons learner we now get the curtains before hanging the curtain rod if that is at all possible. That way, you don't have to worry about the curtains being turning into high-water-pants. You can make them hang wherever you want!

Here you go... the before curtains and after on the right side of the room:


And, on the left side of the room:

The monkey heads resting on the curtain rods are funny hats that my BFF gave to me at my baby shower. She suggested we bring them to the hospital and wear them there. So, we did!
When we got home, we put them back on their curtain-rod-resting-place.

Drawer Lining: 
For this, you get a little photo run-down:

These are some pretty obvious steps, but you get them anyway. If you want to make your life even easier you can just get contact paper or don't line your drawers in the first place! I lined these because I had tons of extra fabric, I wanted the drawers to look pretty, and I bought the dresser off Craigslist and I didn't exactly trust a few spray downs to make it clean.

Step 1: (Thank you New Kids on the Block, every time I ever say "Step 1" I sing "you can have lots of fun). Step one, make sure your fabric is nice and straight and cut off any stringy edges.
Step 2: Measure the drawer and mark the fabric.
Step 3: Cut the fabric.
Step 4: Learn that there is an easier way to match up velcro than by using an intricate arrangement of strips.
Step 5: Put the fabric in the drawer and figure out the velcro arrangement from there.

Tada! Done!!

Ooooohhhh, but this isn't over just yet. Now, I would like to show you what lovely and talented ladies I have in my family! As I said earlier, my mother-in-law sewed the fantastic curtains that you just saw. 

My sister made all of the pillow covers! They looked professional!


My sister-in-law made Cora a super adorable quilt. I had tonsssssss of leftover giraffe fabric so she used that on one side and quilted some neat stuff on the other.


And, my mom, who is not much of a seamstress held onto every toy and book that her future grandchildren could possibly want. And, let me tell you, they (Cora anyway) LOVESSSSSS herself some 1980s Fisher Price toys. That is not my mom's only talent- she broke out her inner seamstress and made this funky rug-thing. It is more of a closet-wall-rug, in my opinion. But nonetheless, it is still cool. 


So, thank you to all of the talented women in my life who helped make Cora's room into the colorful baby abode that it is today. 

Here are the Nursery Chronicle step-diddy-do-dahs that got us to where we are now:


Step 1: Get rid of the old furniture and try out some more baby-centric duds for the room. Crib, bookshelf, and daybed.

Step 2: Convince my husband to do more painting than anyone would ever want to do in their whole life. Start the painting spree by painting over the headboard on the wall. Get a dresser/ changing table and refinish it.


Step 3: Get some more furniture. Start the decorating: Wire display for pictures.


Step 4a: Put up the book slings.


Step 4b: More decorating: Floating shelves.

Step 5: Decorations, Part 3: Hang art above the crib and all around the room

Step 6: Refinish side table and get an ottoman


Step 7: Paint the chalkboard and mirror and hang them.


Step 8: Put up the curtains. Line the inside of the dresser with some of my extra fabric


Step 9: Finishing touches.


And here are a few after photos from the nursery:


Friday, April 19, 2013

The Nursery Chronicles: Step 7: Paint & Hang The Chalkboard & Mirror

The Nursery Chronicles are back soooooooo soon! I know you're excited. I know what you want.

Today, we are jumping into Step 7, where you get to see a chalkboard and mirror get painted and go up.

Chalkboard:
There aren't a lot of things that pass through my house that don't get at least a swipe of the paint brush to them. This chalkboard/ magnetic board from Ikea (called Luns) is no exception.

That practical little guy was first hung on the wall just so we could check something off our list, but soon...


he ended up with a nice colorful yellow painted on him:

The writing on this board was waiting for Cora when she came home from the hospital. We didn't find out if Cora was going to be a girl or boy so we came up with some pretty awesome nicknames for her. For some reason Scott referred to the baby as "Toddles" while she was in my belly. My sister and I named the baby "Santa Sugarbaker" because when I was little I always said I would name my baby "Santa." "Sugarbaker" came into play because Julia Sugarbaker from Designing Women is an awesome sassy southern lady. "Hockpea" is a fake family name. For some reason, it has become a tradition that whenever someone is pregnant on my dad's side of the family we call the baby "Hockpea" until the baby is born. And there you have the run-down of Cora's pre-birth names.

Mirror Time!:
This frame had been hanging around the house for a while and had been used for all sorts of things. I had recently painted it brown and added a remnant of a big ol' bathroom mirror that we took down to it. I had not hung it yet, which made it fair game. The perfect spot for a mirror popped up in Cora's room. So it was decided... Brownie McGee was going to have a whole new life and a bright new color to add to her resume.

Here she is showing off her beautiful brown:

Then, we yellow-ed her up and turned her into this:

Mission accomplished! More yellow added to the room!

Step City is below:

Step 1: Get rid of the old furniture and try out some more baby-centric duds for the room. Crib, bookshelf, and daybed.

Step 2: Convince my husband to do more painting than anyone would ever want to do in their whole life. Start the painting spree by painting over the headboard on the wall. Get a dresser/ changing table and refinish it.


Step 3: Get some more furniture. Start the decorating: Wire display for pictures.


Step 4a: Put up the book slings.


We  made it 3 whole steps before I divided one up. Yes, I'm very sorry. I had to add a part a and part b to Step 4. It was getting a bit long. So, now you get to enjoy it in 2 parts.

Step 4b: More decorating: Floating shelves.

Step 5: Decorations, Part 3: Hang art above the crib and all around the room

Step 6: Refinish side table and get an ottoman


Step 7: Paint the chalkboard and mirror and hang them.


Step 8: Put up the curtains. Line the inside of the dresser with some of my extra fabric


Step 9: Finishing touches.


Here are some photos of the rest of the nursery!


Monday, April 15, 2013

The Nursery Chronicles: Steps 6: Refinish Side Table, Add Ottoman

The Nursery Chronicles are coming on strong. You got one last week, one is in your face right now, and you can expect another one later this week. 

In Step 6 I will show you the side table that we refinished. But that is not all... you also get to see an ottoman come to town!

Side table:
You have seen the side table live in the bonus room au natrule. But, as you may have realized by now, I love to add a little paint to things.

My lovely lovely husband did a bit of sanding and then adding a couple coats of white paint to the top and sides of it.

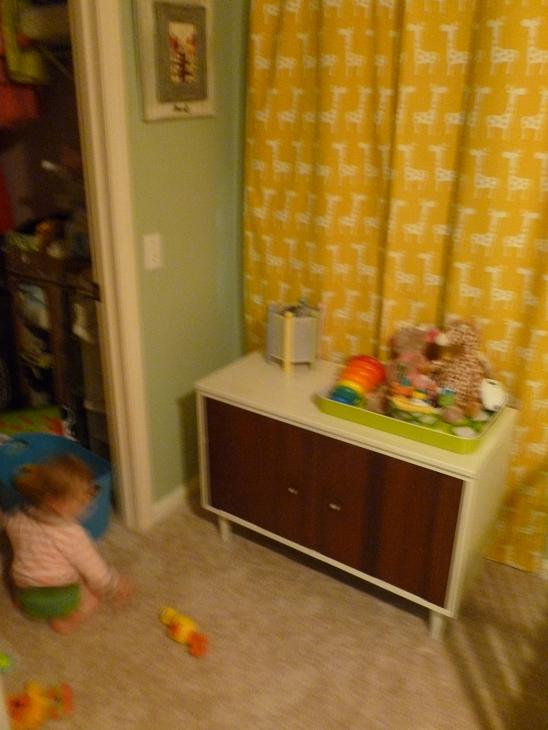
Here is how it turned out:

Here is a less blurry, less cluttered photo:

Ottoman:
We also added a ottoman because I had heard it is important to have something to put your legs up on while you are nursing. It turns out that I hardly used the ottoman until I discovered that I had a bunch of unused storage space.  (<-- ps check out this link if you want to see some cute photos of a really happy Cora in a bucket!)

Actually, that is not completely true about the ottoman not getting any use... for some reason my mom and I decided that it would be a normal (and totally safe) place to take photos of a 3 day old baby.
It should definitely be noted that there were hands just outside of the camera's view waiting to catch a baby on the move.

So, here it is: a green ottoman that I believe was purchased at Target for about $20.


The Chronicles of my baby's abode are almost complete! Only 4 more steps to go! 

Step 1: Get rid of the old furniture and try out some more baby-centric duds for the room. Crib, bookshelf, and daybed.

Step 2: Convince my husband to do more painting than anyone would ever want to do in their whole life. Start the painting spree by painting over the headboard on the wall. Get a dresser/ changing table and refinish it.


Step 3: Get some more furniture. Start the decorating: Wire display for pictures.


Step 4a: Put up the book slings.


We  made it 3 whole steps before I divided one up. Yes, I'm very sorry. I had to add a part a and part b to Step 4. It was getting a bit long. So, now you get to enjoy it in 2 parts.

Step 4b: More decorating: Floating shelves.

Step 5: Decorations, Part 3: Hang art above the crib and all around the room

Step 6: Refinish side table and get an ottoman


Step 7: Paint the chalkboard and mirror and hang them.


Step 8: Put up the curtains. Line the inside of the dresser with some of my extra fabric


Step 9: Finishing touches.


Here are some photos of the rest of the nursery!


Friday, March 29, 2013

The Living Room Chronicles: Step 5: The Fireplace

Yes, this is about to happen again. I am about to show you how I spent WAY too much time with the program Paint a few years ago. Pretty much anytime you notice that I have altered a photo in anyway it is through the super high-tech program, Microsoft Paint, that comes with every computer and most people don't even open.

This time, I was doctoring up photos of living room potential. I drew out a few floor plans and then I went crazy drawing different plans for our fireplace.


You had better believe that I am not going to let all of my hard work on Paint go to waste... no no no! I am going to share it with you fine folks.

Our living room is super duper long. So, trying to figure out a furniture arrangement was not the easiest thing in the world. I came up with a few choices that would work with the new fireplace situation. Do you want to take a look at a couple of them? 
I thought so!

Things are probably only going to get more interesting from here. So, buckle up!

Who likes that squirrel hanging out in my window?

Ohhhh I learned how to take the sea legs off my drawings and straighten things up.


And get ready for these... things get a little fancy!

It isn't over yet! I took a photo I found and stuck my fireplace idea in.

Which one did we choose?
None of them! We ended up taking so long with the master bathroom remodel that we just left the fireplace alone. Also, Scott and I were both somewhat indifferent about whether or not to change out the stone wall. Some people thought it would be a crime to get rid of it. Since we weren't 100% we just left it as is.

But things have definitely changed since the last time we took a look at this green machine. It turned cream! It has officially been de-funkyed. No more lovely Asparagus Green by Behr.
Now, it is "cut a chunk out from behind the refrigerator and have Home Depot paint match that color because I ran out of paint and like a dummy I didn't keep the paint can." Have you ever head of that color? It is a lovely one.


The blue stuff around the fireplace is painter's tape. And, the green patch will eventually become cream colored.

We are still trying to decide if the trim around the fireplace should be white or the color of the wall. What do you think?

Next time I have a completely fascinating post like this I will save it until the weekend, but give me a break- we have 3 days left until photos are taken for our house listing. 


Just 2 steps left until we can check this Chronicle off the list!


Step 1: Move in. Put in whatever furniture we had. Hang art.


Step 2: The Craigslist deal of a lifetime. New Sectional Sofa.

Step 3: New coffee table (Step 3 Introduction found here)

Step 4: DIY remote control holder. A tiny, tiny step, but we are still calling it one.


Step 5: Should we change out the fireplace?


Step 6: The plant table and the plants


Step 7: Finishing touches


In case you can't wait the 3 steps we have left to see the finished product. Here it is:


It is birthday season!!! Happy Birthday to my GRANDMA and to Suzan!
I hope you two have spectacular birthdays!!!

ps I was still learning how to dye my hair when this photo was taken... hence the reason for the orange hair.