Showing posts with label craigslist. Show all posts

Wednesday, November 14, 2012

Hacking The Expedit: Turning A Bookcase Into A Coffee Table

There is a website called Ikea Hackers that is  devoted to altering Ikea products. It is fabulous.

This hack has been done a 100 times but I am going to make it 101! And I am going to include some step by step action AND an orange dinosaur pinata! Take that hackers!


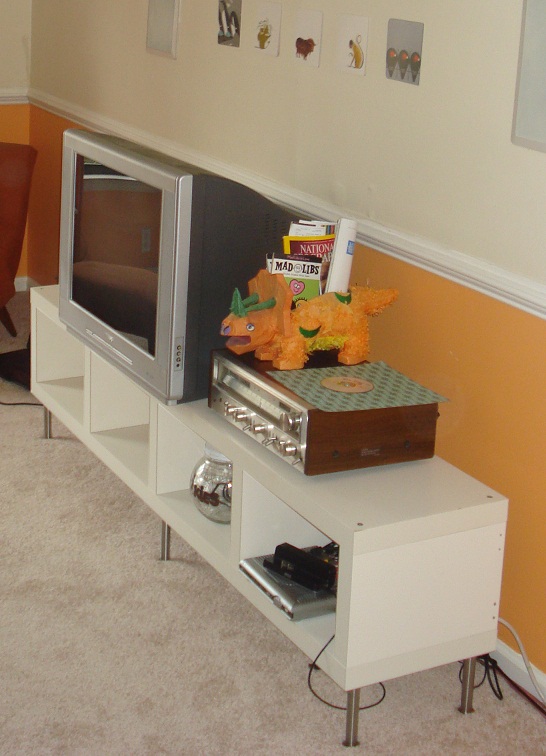
This lovely Expedit shelving unit was bought from Senor Craigslist himself for a mere $20. If you live in a fairly metro area near an Ikea you can almost always find some kind of Expedit piece on Senor Craigslist.

I bought 2 sets of Capita 8" legs (4/pack) for $14 each.
I laid out where I wanted the legs to go. I was only planning to use six of the legs. But, I knew there was a chance I might use the finished product as a window seat. So, I threw the other two on for a bit more stability.

 I marked where the screws needed to go with a Sharpie then I moved the metal plate.

I didn't feel like getting a drill bit. So, I used the screws as the drill bit. I screwed each one into its place then unscrewed those suckas right out of there.

I screwed the plates into place, attached the legs and wa-la! Finito! 


Mrs. Ex-Pita (get it- a combo of Expedit and Capita... my goodness, what a creative name!) tried her hand out as a media console. Look at all of that media- it is like we are totally hip media geeks who have to have the latest thing. And helllllllo orange dinosaur pinata. I have been waiting to feast my eyes on you all day!


You've seen her (Mrs. Ex-Pita) pop up in Cora's nursery as a window seat. She lived there for about a month while the room was still in the "throw all the extra furniture in there and see what works"phase.


Mrs. Ex-Pita finally found a place to live as a coffee table in the funky retro bonus room. But I can't show you that yet because we are still counting down the chronicles to the big reveal!


And now the Would You Rather of the day!

WYR... go 8 years without eating any ice cream

or
have to keep your fingernails ridiculously pointed  for 3 weeks (like the ones pictured below but without the fancy design or the bedazzling)?


Sources: ExpeditCapita

Monday, October 15, 2012

The Master Bedroom Chronicles: Step 4 And The Start Of The Daily WYR

This past weekend Scott and I went to the lovely and very fun wedding of one of his college friends. It was my first weekend away from Cora and it was a great time... the groom even did a little Young MC- Bust A Move solo! We got to see lots of Scott's college friends. As usual, Scott was tossing out lots of Would You Rather questions. His friend, John, said that he would answer a WYR every day. So, today is the day that the daily Would You Rather (WYR) question starts on Never Listless. It will be at the end of the post. Answer away (John Ake- that means you).

I am going Chronicle-wild around these parts. It is time to take a jog back to The Master Bedroom Chronicles. We are in Step 4 or as the New Kids on the Block would say, "Step Four. I can give you more."

Step 4: Redo an old chair for the desk.


Wooooooooooo! A peak at the after photo first!


Once again, I am a bit of a lame-o when it comes to having a proper before photo. The chair was a brown chair with a fake leather seat cover. It came free with my art deco vanity on Craigslist. I didn't even want it, but they insisted it was part of the deal. So, I took it.


You can see the black, fake leather seat pad in this photo.


I am glad they forced it on me because now I love the chair and am not so fond of the vanity. 
This chair lived in the garage for the first two years that I had it. I was under the impression that the seat would be almost impossible to remove and reupholster. I had done some investigating and that was my conclusion.  A couple of years later, I took another look.  Maybe it was that I had a little more DIYing under my belt. Maybe I was blind the first time I looked. But, as you might be able to see from the photo, this chair is very modify-able!


I started the project immediately after realizing my mistake. Usually, I like to think about things, write some lists, look at lots of photos online, write some more lists. Then, about 3 months later I may take the first step in the project. This time, I was so excited that I went straight to seat-ripping. 

Next, I painted part of it yellow and part of it grey. It turns out I didn't like yellow or grey. I liked the original brown color. So, I had a sanding party. I taught that yellow, grey, and brown paint a lesson. 


I picked out a brown, glossy spray paint.  I found out that glossy was probably not the best idea.  As you can tell from the photos, I could not get the chair sanded down perfectly and the inconsistencies will show up a lot more with a gloss finish than with a flat finish.  


Next up... break out the fabric stash. I found the perfect one right away (because I am a crazy lady with an enormous bin of fabric who doesn't even sew).   I am obsessed with this Amy Butler fabric.  


I used a staple gun to attach the fabric to the seat cushion.


Spray paint time! The key to good spray painting it patience! I like to do 3-5 thin coats about 3 hours apart (depending on what the can recommends). I am not a patient person. I want to spray up a storm and get it all done in one shot. But everyone knows what that leads to- drip city and thick, gooey paint that peels off easier and just doesn't work out. 
Usually, I try to save up my spray painting to do list for one big paint extravaganza. Since I will already be spending lots of time waiting for one project to dry I hardly notice if I throw a few extra projects in.

Other spray painting tips:

  • sand before you paint
  • don't spray very close
  • wear gloves
  • use a mask
  • have good ventilation
  • lots of drying time


 I put the seat back on and YAY... I had a beautiful, new chair... one that I can't believe I tried to pass up for free.


Step 1: Move in. Throw a bunch of random stuff into the room and live with it for a while to figure out how we wanted to use the space.


Step 2: Rearrange the furniture and add a seating area.


Step 3: Redo a desk with a funky chevron pattern.


Step 4: Redo an old chair for the desk.


Step 5: New comforter and lamps.


Step 6: Headboard, Part 1


Step 7: Make some wedding related art.


Step 8: New entertainment center.


Step 9: Add some new art


Step 10: Headboard, Part 2. Finishing touches. Try to bring it all together.


The New Kids on the Block's Step by Step:

Step 1: We can have lots of fun 


Step 2: There's so much we can do

Step 3: It's just you for me

Step 4: I can give you more

Step 5: Don't you know that the time has arrived. HUH!

cover image of another cassette that I wore out from here
Donnie, you are lookin' COOOL!

Here is a little reminder of what the Master Bedroom turns into after all of the steps are complete:


You want more chronicles? You're ready for the next chapter of The Master Bedroom Chronicles? I am sorry to tell you that it's not here yet. But go ahead and catch up on the rest of your stories: The Nursery Chronicles and The Bonus Room Chronicles. 


WYR... Get home and there is a deer in your kitchen. It didn't mess anything up  getting in but you have to deal with getting it out.
or your house smells like pickles for a month.

This WYR is from Scott courtesy of a 6 hour drive.

Friday, October 5, 2012

The Master Bedroom Chronicles: Step 3


The Master Bedroom Chronicles are back. Who is excited? Only 7 more steps until you get to see the finished product! Sike! You know I couldn't hold off. You have seen it all before. What you haven't seen is this table!


OK. You got me! You have seen the table before. You saw it here when I wrote a thrilling post about drawing a million versions of it in my high-tech computer program, Paint.


But here is what you have to look forward to in this post:


  • a list about what we consider our furniture upgrades
  • a very extensive write-up about the table in question
  • and BOB BARKER! Gotcha again! If you are following along closely to this blog you know that Bobbie B isn't setting foot here until we get to The Bonus Room Chronicles: Step 2!


On with the show...

We have been slowly transitioning the furniture in our house.


Stage 1: We accept anything that is free! This includes things that were given to us, furniture we had when we were little, anything that was REALLY, REALLY cheap (practically free).

Stage 2: Upgrade to slightly nicer furniture from our buddy, Craigslist.

Stage 3: Upgrade to Ikea and Target furniture.

Maybe there will be more stages in the future. But, for now, Ikea, Target, and Craigslist are treating us pretty well.


We got the table below from Scott's parents. 


I don't think they ever used it. That could be because the table pictured above could not perform any of its most important table duties. 

Scott's parents offered it to us and we were in stage one (free stuff!) so we happily took it!

I really liked the body of the table but I didn't care for flowers that were stenciled on top of it. Sorry, I don't have any photos of it in the flower stage. I didn't take any until I transformed it into what Scott called "the skeleton desk."


I used it in the living room. Eventually, we bought a new sectional and the skeleton desk lost its home. I am big on reusing so I set to work thinking of where it should reside. 


The master bedroom was also going through its own transition so I thought I would give the desk a chance there. I was falling out of love with this art deco-ish vanity that currently called the master bedroom home. 


So, out with the art deco vanity and in with the skeleton table (with some modifications).  I wanted to add more yellow and grey to my master bedroom and thought that the skeleton table might be the perfect opportunity to bring it in.
I envisioned a brown top (so it would fit with the other brown furniture) and either a yellow or grey bottom.

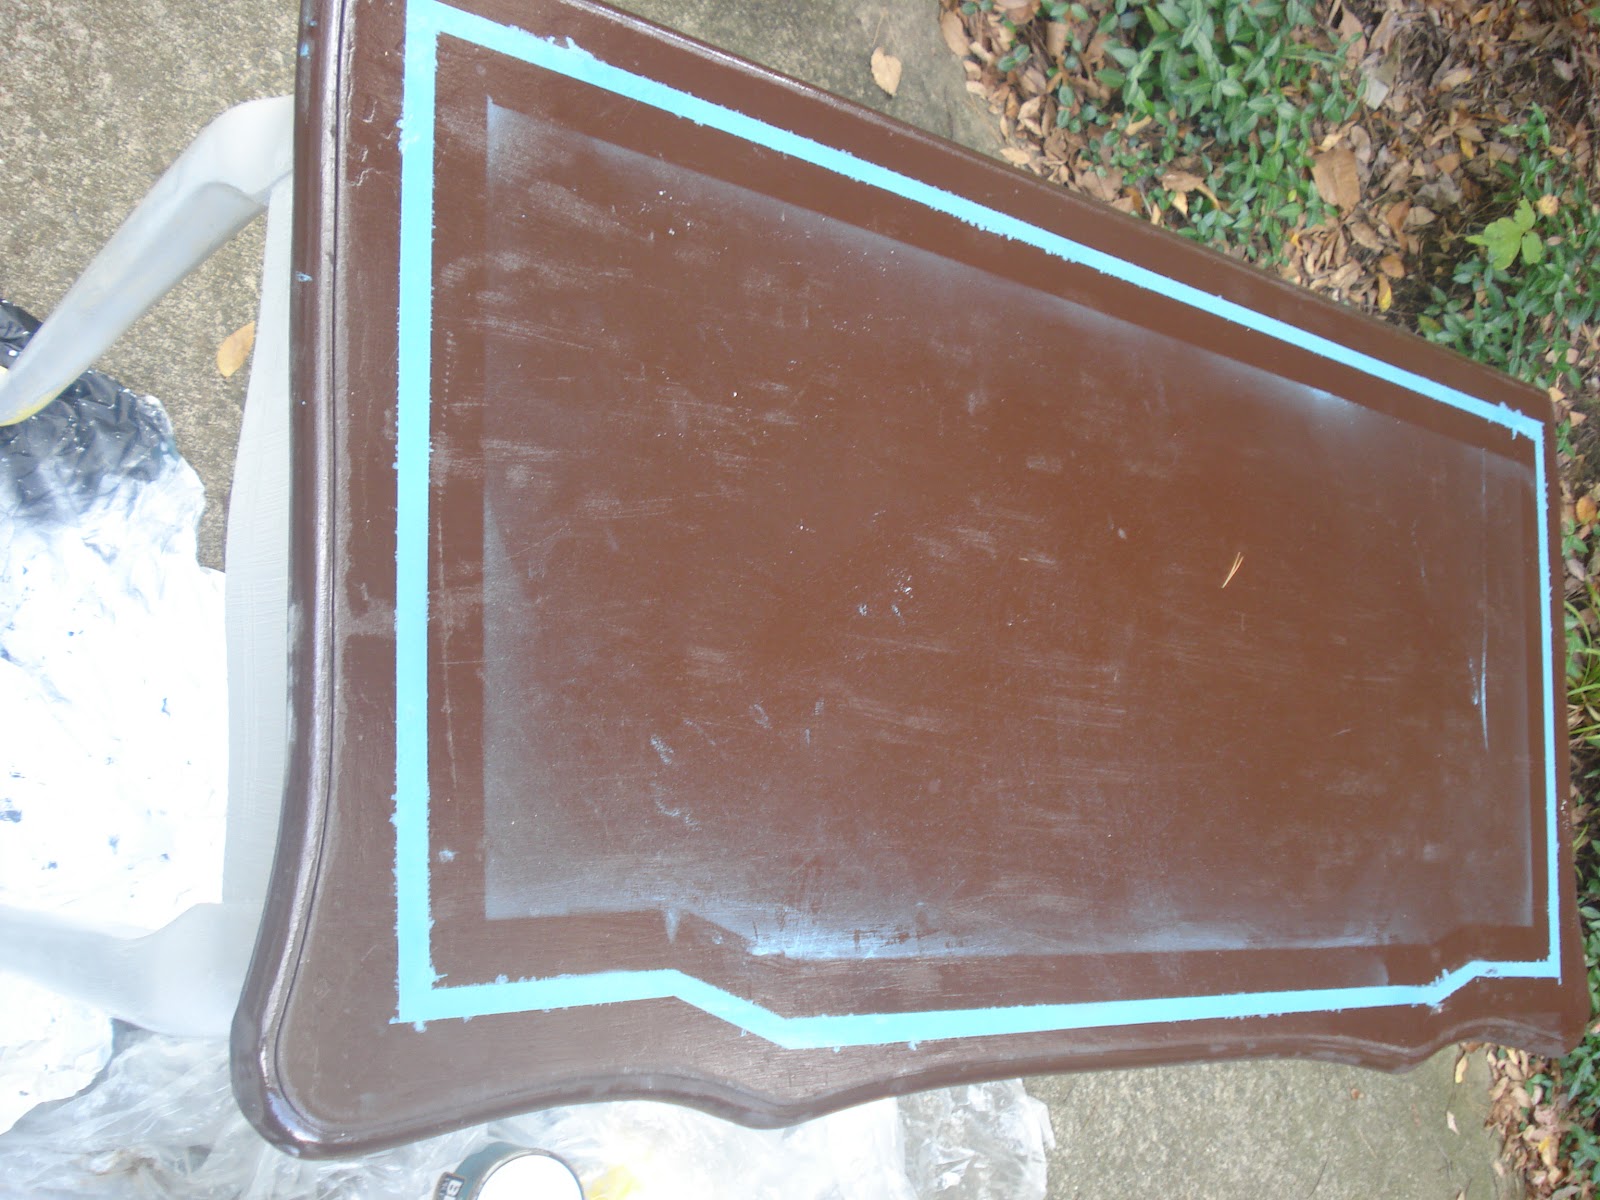
I painted the top brown... didn't like it and thought a blue line would help tie in some blue from the room and, at the same time, break up some of the brown.  I did a terrible job spray painting so I had to rethink the whole thing.


I also painted half of the bottom yellow and the other half grey in order to help me pick between them.  I chose grey.


I decided to keep the brown edge and the blue line and cover my spraypainting mishap by painting the inside grey. 


I don't know where the blue drawer really came in... I think I just got excited about having extra spray paint.


I wasn't excited by the way it looked and still really want to bring in some yellow.  So, I added a yellow chevron pattern. 


In this photo, it may look like I am done... nope.  The lines I drew to make the chevron pattern showed through the paint. 
I also had some mistake lines and they were really obvious. 


 So, I painted some Killz on the lines and repainted.


I painted the knobs grey with a yellow circle outline.


Then I polyurathained the whole thing to make it more durable and TADA!


I also did some chevroning a stool in the master bedroom. Unfortunately, I did the chevroning like an Edward Scissorhands wannabe so it didn't turn out fantastically.

Check out the sweet phone on the chair. Do you like how I prominently displayed it for the photo?

That concludes Step 3! I've enjoyed having you! Stop by tomorrow for some toddler words of wisdom!


Below is a list of the steps that got us from where we started to where we are now.  And at the very end I have the AFTER photos of the whole Master Bedroom Chronicles.

Step 1: Move in. Throw a bunch of random stuff into the room and live with it for a while to figure out how we wanted to use the space.


Step 2: Rearrange the furniture and add a seating area.


Step 3: Redo a desk with a funky chevron pattern.


Step 4: Redo an old chair for the desk.


Step 5: New comforter and lamps.


Step 6: Headboard, Part 1


Step 7: Make some wedding related art.


Step 8: New entertainment center.


Step 9: Add some new art


Step 10: Headboard, Part 2. Finishing touches. Try to bring it all together.


Here is a little reminder of what the Master Bedroom turns into after all of the steps are complete:


Don't forget that there are three Chronicle series going on right now! Forget prime time TV. Just wait a week for your new Chronicles episodes and you will be set! The Nursery Chronicles, The Bonus Room Chronicles, and The Master Bedroom Chronicles


Thursday, September 27, 2012

The Nursery Chronicles: Step 2: Painting Spree

Welcome back to The Nursery Chronicles.

A couple of weeks ago we checked out Step 1Get rid of the old furniture and try out some more baby-centric duds for the room. Crib, bookshelf, and daybed.


Today, we enter into the exciting world of:
Step 2: Convince my husband to do more painting than anyone would ever want to do in their whole life. Start the painting spree by painting over the headboard on the wall. Get a dresser/changing table and refinish it.

As I mentioned in The Nursery Chronicles start-up post, the nursery used to be our guest bedroom. And for some reason I decided the guest bedroom needed a headboard painted on the wall. Luckily, we had some of the paint leftover.


So, it was easy to turn this:


Into this:


Next up, on the painting list was to transform the dresser we found on Craigslist.
Here is the photo from the CL ad:


I knew I wanted the dresser to be yellow and white but I wasn't sure which sections to paint what. That's when I said HELLO to the super basic program, Paint!


I took wayyyyy too much time trying out possible paint jobs and came up with these options.

#1
#2
#3
#4
#5
#6
Sorry to waste your time with all of the possible options too!
I narrowed it down to 2 and sent an email to some friends and family members (who are kind enough to spend their time looking at such silly things). The answer was overwhelmingly choice #1.


So, off to work my lovely husband went. The hardest part was taking all of the old paint off. The lady who we bought it from thought she was doing us a favor by adding another coat of polyurathane to it right before we picked it up. I can safely say... one of my least favorite favors ever. Not only did that mean Scott had to take even more paint off but it meant that this overcautious pregnant lady had to sit in a car filled with some serious paint fumes. I stuck my head out the window (Ace Venture style) and took in the lovely rigid February weather. Luckily, it was a short drive.


Scott put some paint thinner on, then sanded it down and started adding layers of paint.


Those sure are some freshly sanded drawers.


More paint!


Here is how the lovely dresser turned out after about 50 Scott hours! Thank you again, Scott. You are the best!!!!


That ends this edition of 
The Nursery Chronicles   Step 2: Convince my husband to do more painting than anyone would ever want to do in their whole life. Start the painting spree by painting over the headboard on the wall. Get a dresser/ changing table and refinish it.

Here is a complete list of the steps again in all of their steppin' glory:
The FINAL after photos are at the end of this post!

Step 1Get rid of the old furniture and try out some more baby-centric duds for the room. Crib, bookshelf, and daybed.


Step 2: Convince my husband to do more painting than anyone would ever want to do in their whole life. Start the painting spreeby painting over the headboard on the wall. Get a dresser/ changing table and refinish it.


Here is what you have to look forward to in the future:


Step 3: Get some more furniture. Start the decorating: Wire display for pictures.

Step 4: More decorating: Put up the book slings. Floating shelves.


Step 5: Decorations, Part 3: Hang art above the crib and all around the room


Step 6: Refinish side table and get a few more pieces of furniture


Step 7: Paint the chalkboard and mirror and hang them.


Step 8: Put up the curtains. Line the inside of the dresser with some of my extra fabric


Step 9: Paint the mailbox. Finishing touches.


Just a reminder... when we get through all of these steps we get to this:


Hope to see you tomorrow!