There will just be two Chronicles left... The Living Room Chronicles and The Master Bedroom Chronicles
Were you hoping to get another glance at my fabulous skills using the super basic program, Microsoft Paint? Good!
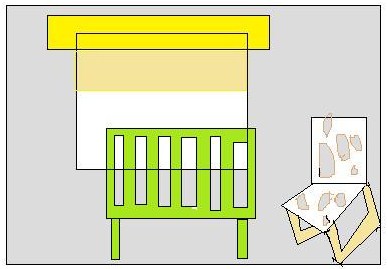
When I was planning the room, I envisioned something like this:

The main differences were that I added a bunch more art, less photos in the bookshelf (and wayyyy more books), didn't go with yellow bedding or crib skirt, went with yellow curtains instead of green, bought a white Expedit bookshelf from Ikea instead of painting an old one white with yellow behind the shelves, my mom gave me her old rocking chair so I did not end up buying the one from Ikea that I had picked out, and I did not make a pretty yellow mobile.
I considered adding yellow stripes to one wall of the nursery, but decided against it after my lovely husband said that he was getting really tired of spending all of this time painting!


- A Craigslist find
- Ikea Poang rocking chair
- White bookshelf with yellow background. Unfortunately, I didn't save the link.
- Pretty flowers painted on the wall. Link unknown (sorry)!
- Ikea Gulliver crib
- White West Elm Window Daybed
- Gray Ikea Gislev rug
- DIY Bookslings
- Pretty mobile. Another link unknown (double sorry)!


I wish I could finish this chronicle shmonicle off today, but you know how like to leave you hanging. I will be back soon enough to show you the final photos.
Here are the afters that I have been showing you throughout all of The Nursery Chronicles, but I have changes things up a bit since then. So, just you wait.


Step Time:
Step 1: Get rid of the old furniture and try out some more baby-centric duds for the room. Crib, bookshelf, and daybed.
Step 2: Convince my husband to do more painting than anyone would ever want to do in their whole life. Start the painting spree by painting over the headboard on the wall. Get a dresser/ changing table and refinish it.
Step 3: Get some more furniture. Start the decorating: Wire display for pictures.
Step 4a: Put up the book slings.
Step 4b: More decorating: Floating shelves.
Step 5: Decorations, Part 3: Hang art above the crib and all around the room
Step 5: Decorations, Part 3: Hang art above the crib and all around the room
Step 6: Refinish side table and get an ottoman
Step 7: Paint the chalkboard and mirror and hang them.
Step 8: Put up the curtains. Line the inside of the dresser with some of my extra fabric
Step 9: Part 1, Part 2. Finishing touches.

You are awesome on the Microsoft paint program!
ReplyDeleteVery impressed.